RasQberry Test Report
The guide below is meant to walk you through installation and initial setup performed using RasQberry. The instructions build upon each other so if this is your first time, it is strongly advised to follow them step by step. To simplify and eliminate errors, you can also copy and paste commands from the guide to the terminal.
Before we start, please be aware that the tests that follow were conducted under these conditions:
Hardware used
- Raspberry Pi 4
- SanDisk Extreme Pro 64GB microSDXC UHS-I V30 card
Software used
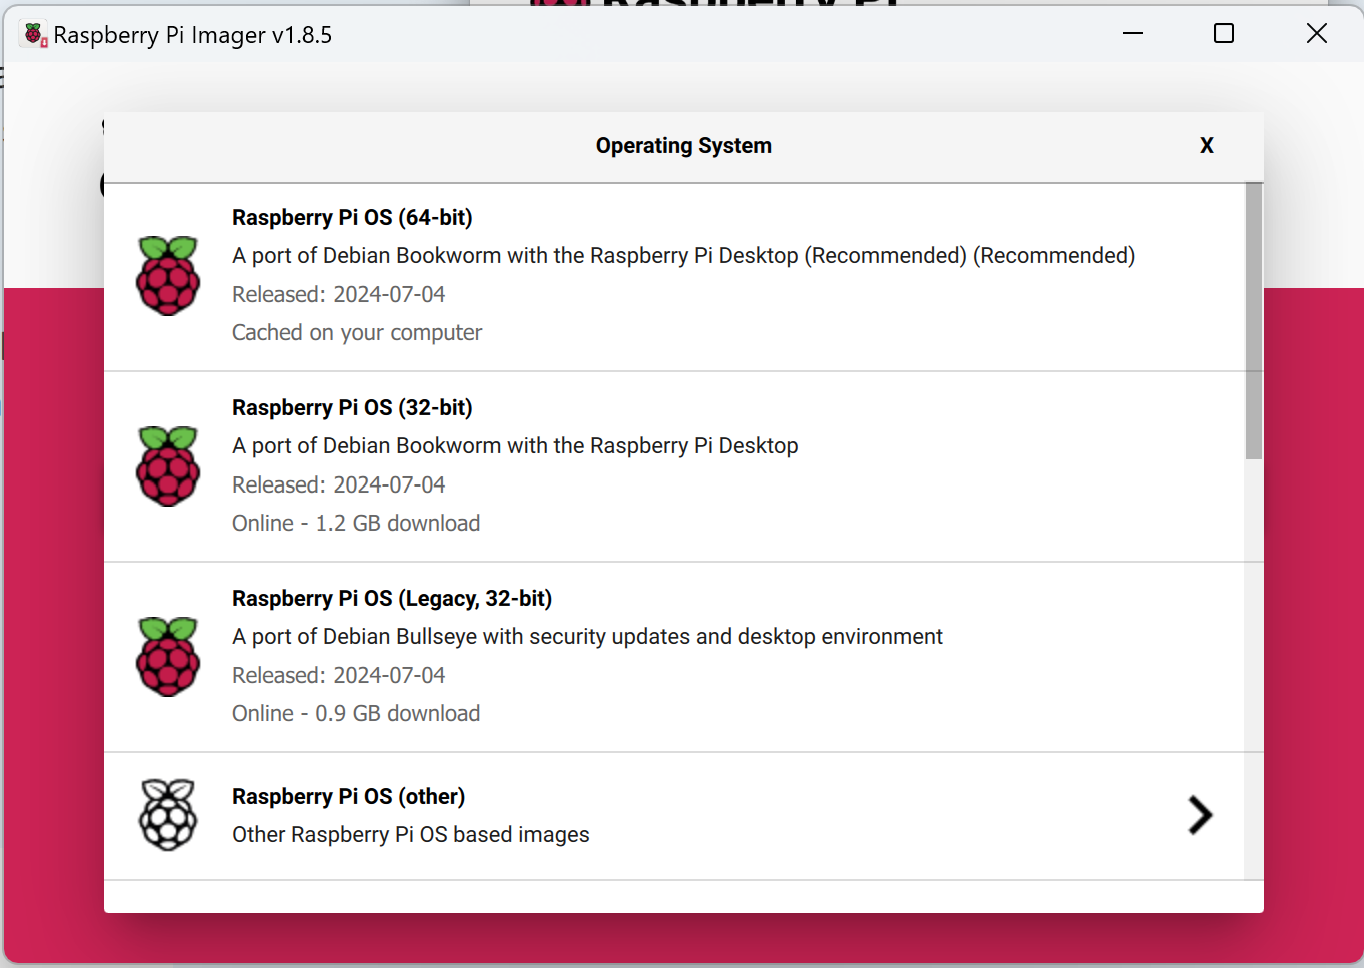
- Raspberry Pi OS Bullseye (Legacy 32 bit) with desktop
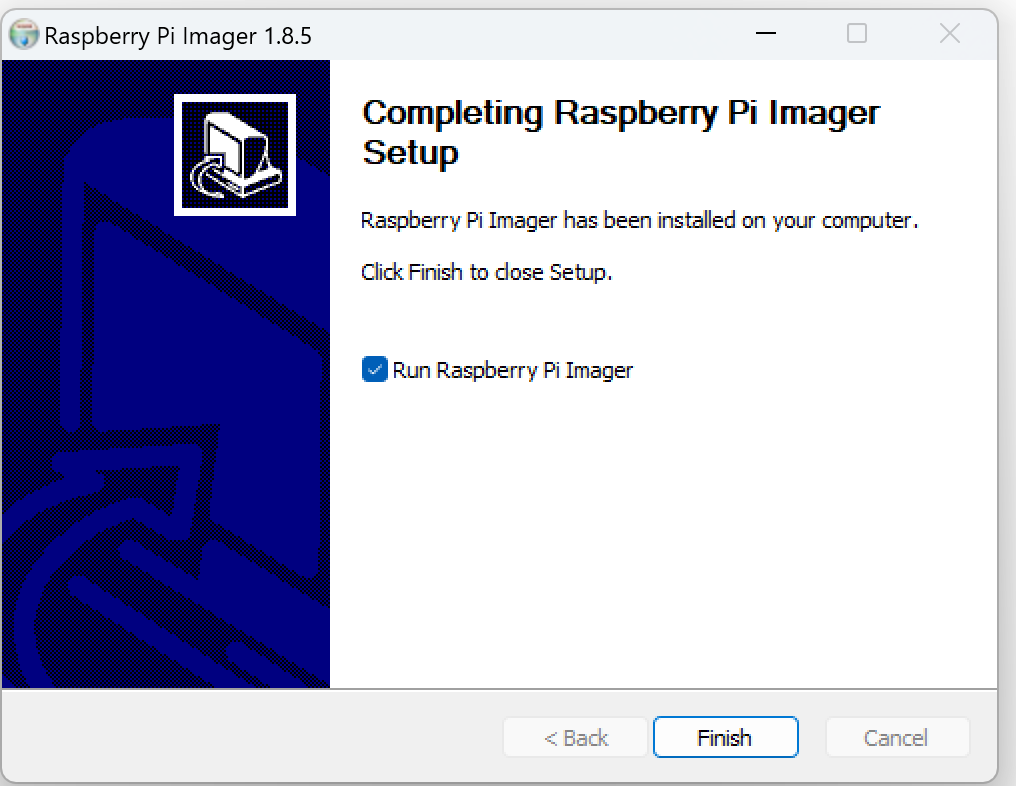
- Raspberry Pi Imager 1.8.5
Settings
- Default Username
piis used - RasQberry is installed in the home directory of the default user
pi
Output seen after installing Bullseye but before installing RasQberry
pi@raspberrypi:~ $ lsb_release -a
No LSB modules are available.
Distributor ID:	Raspbian
Description:	Raspbian GNU/Linux 11 (bullseye)
Release:	11
Codename:	bullseye

pi@raspberrypi:~ $ uname -a
Linux raspberrypi 6.1.21-v8+ #1642 SMP PREEMPT Mon Apr  3 17:24:16 BST 2023 aarch64 GNU/Linux
Step 1: Preparing the Raspberry Pi
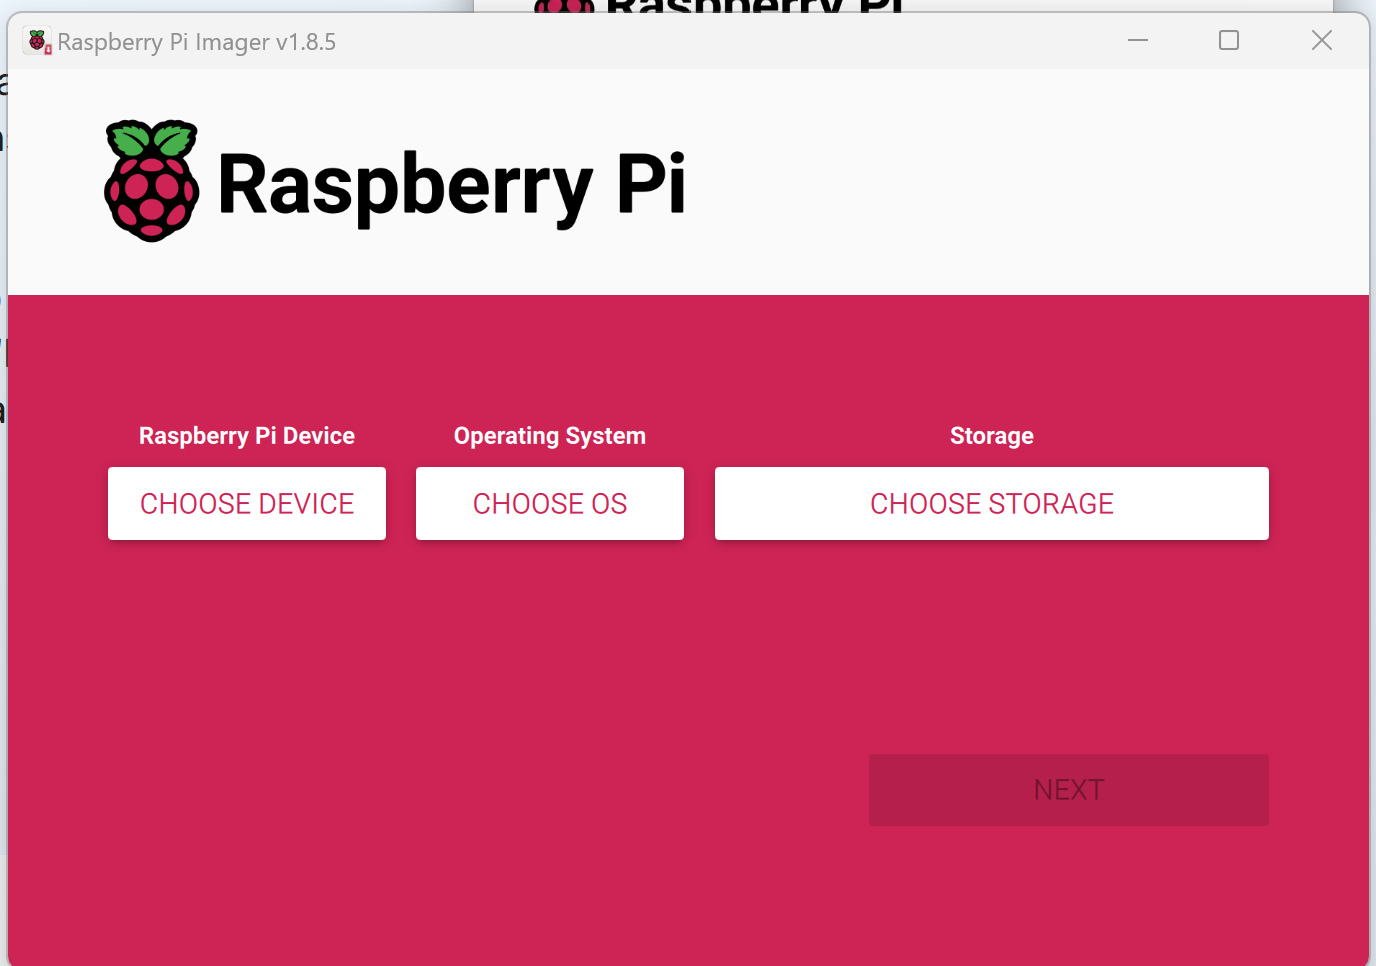
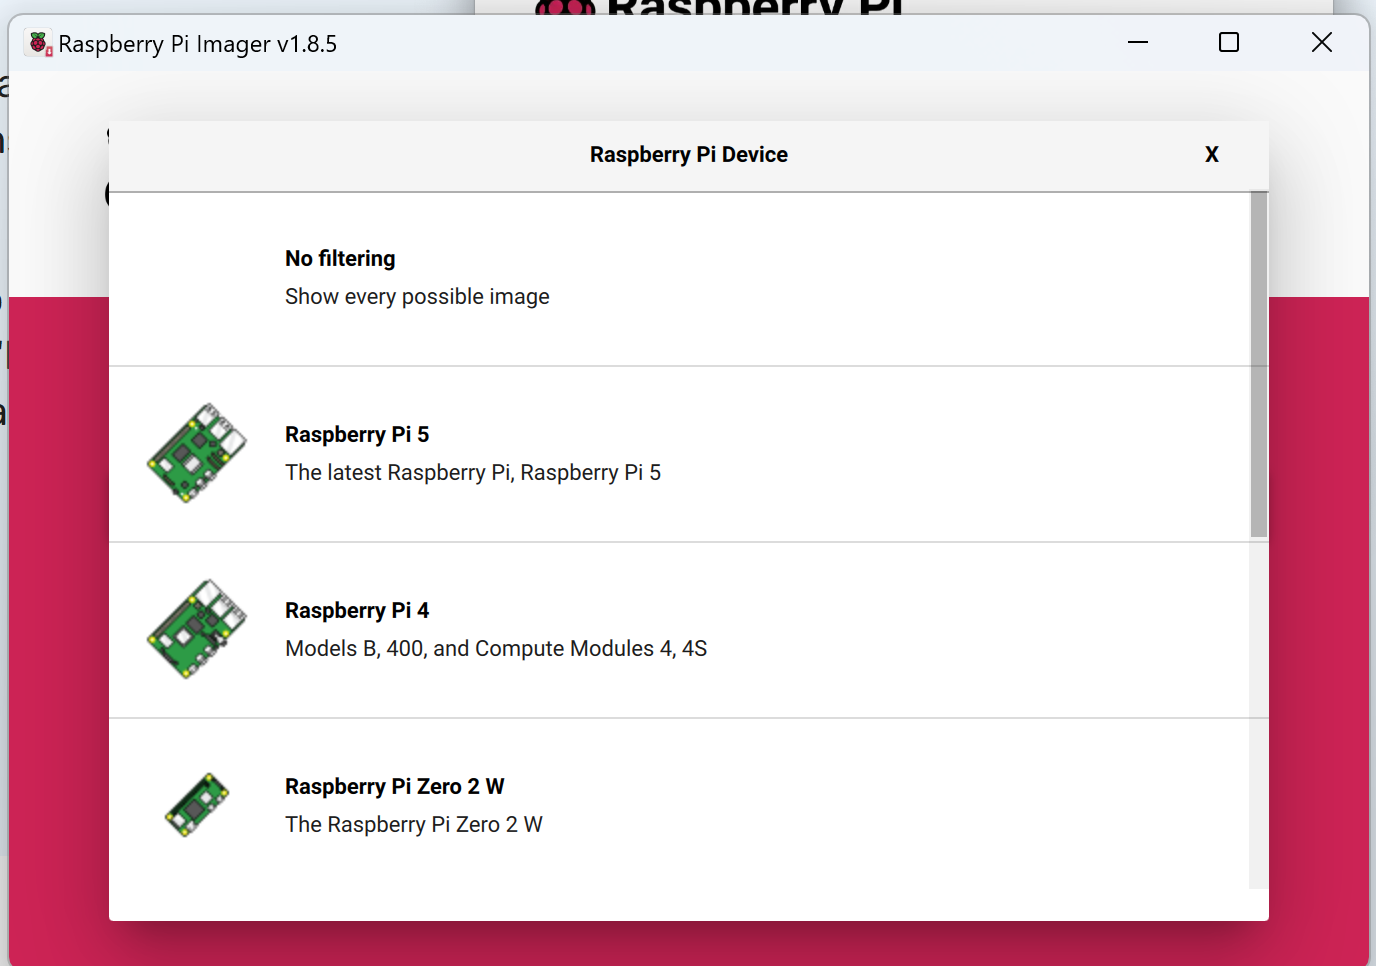
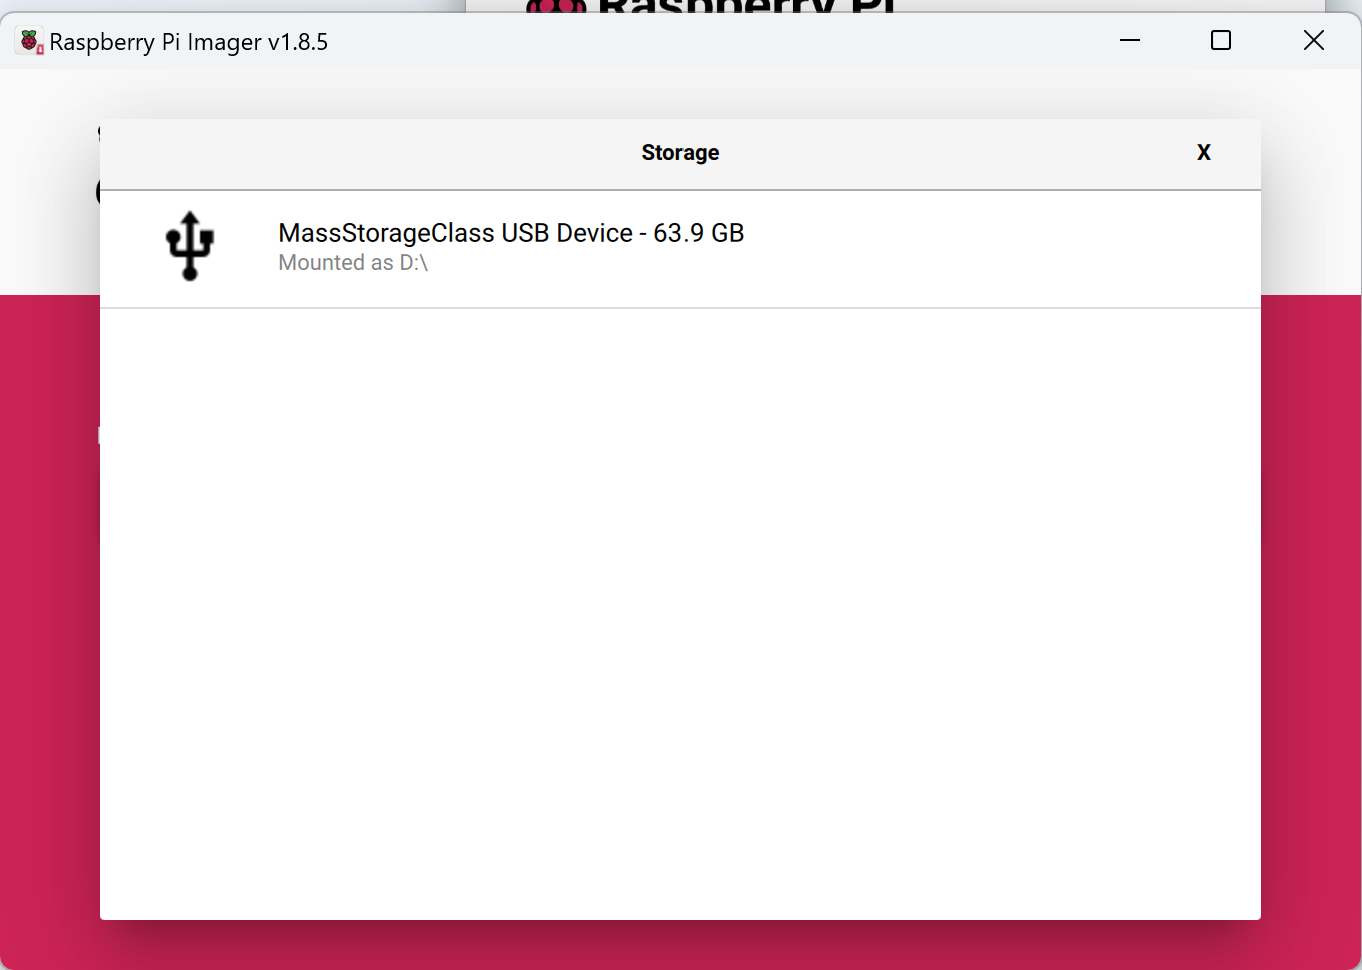
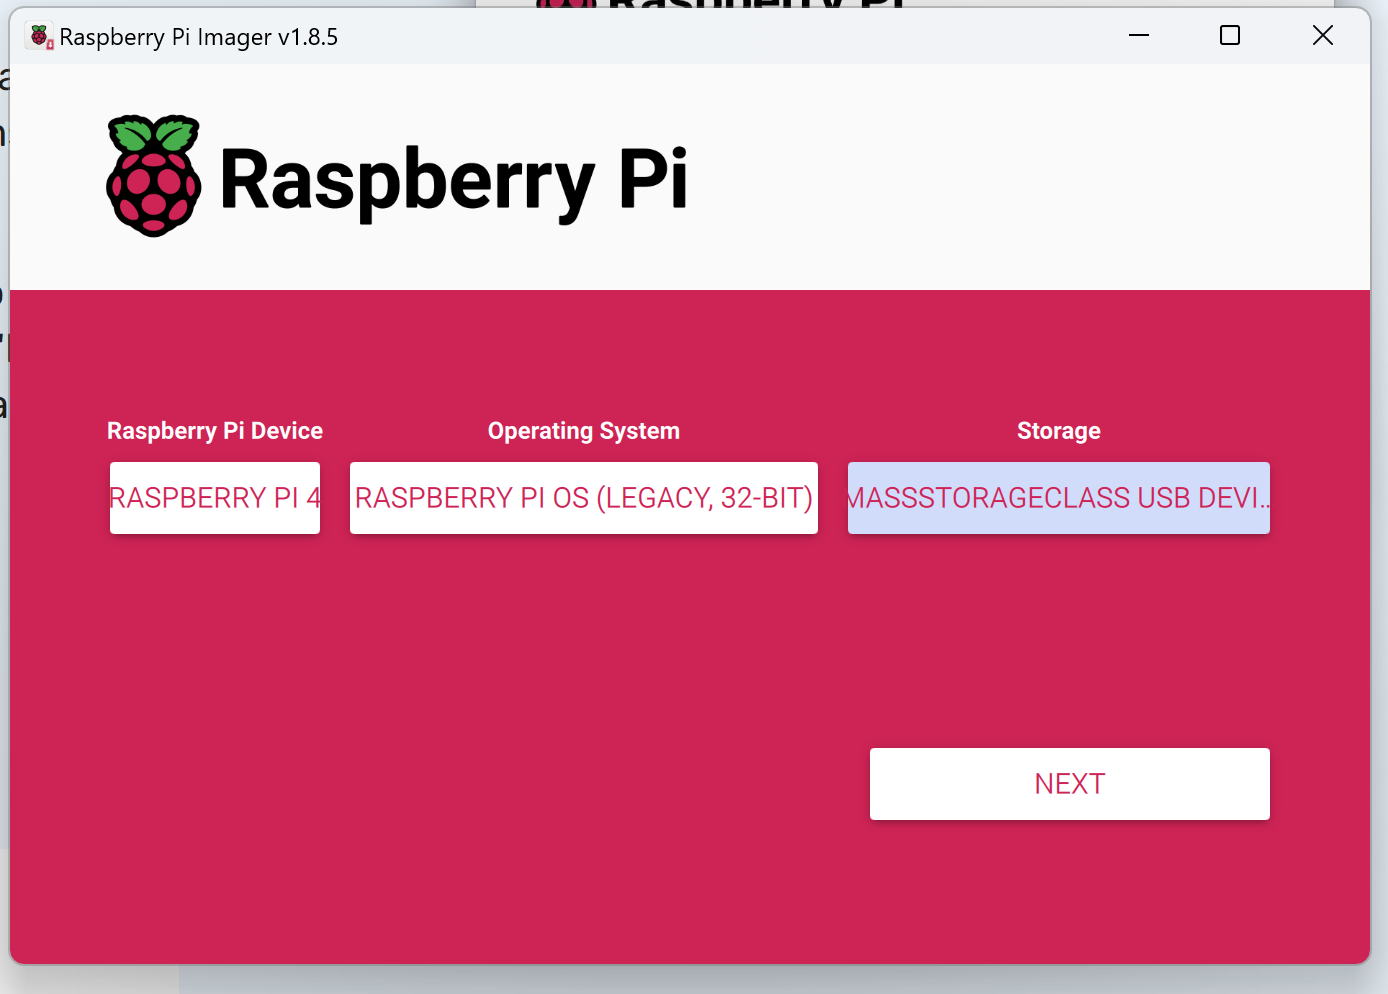
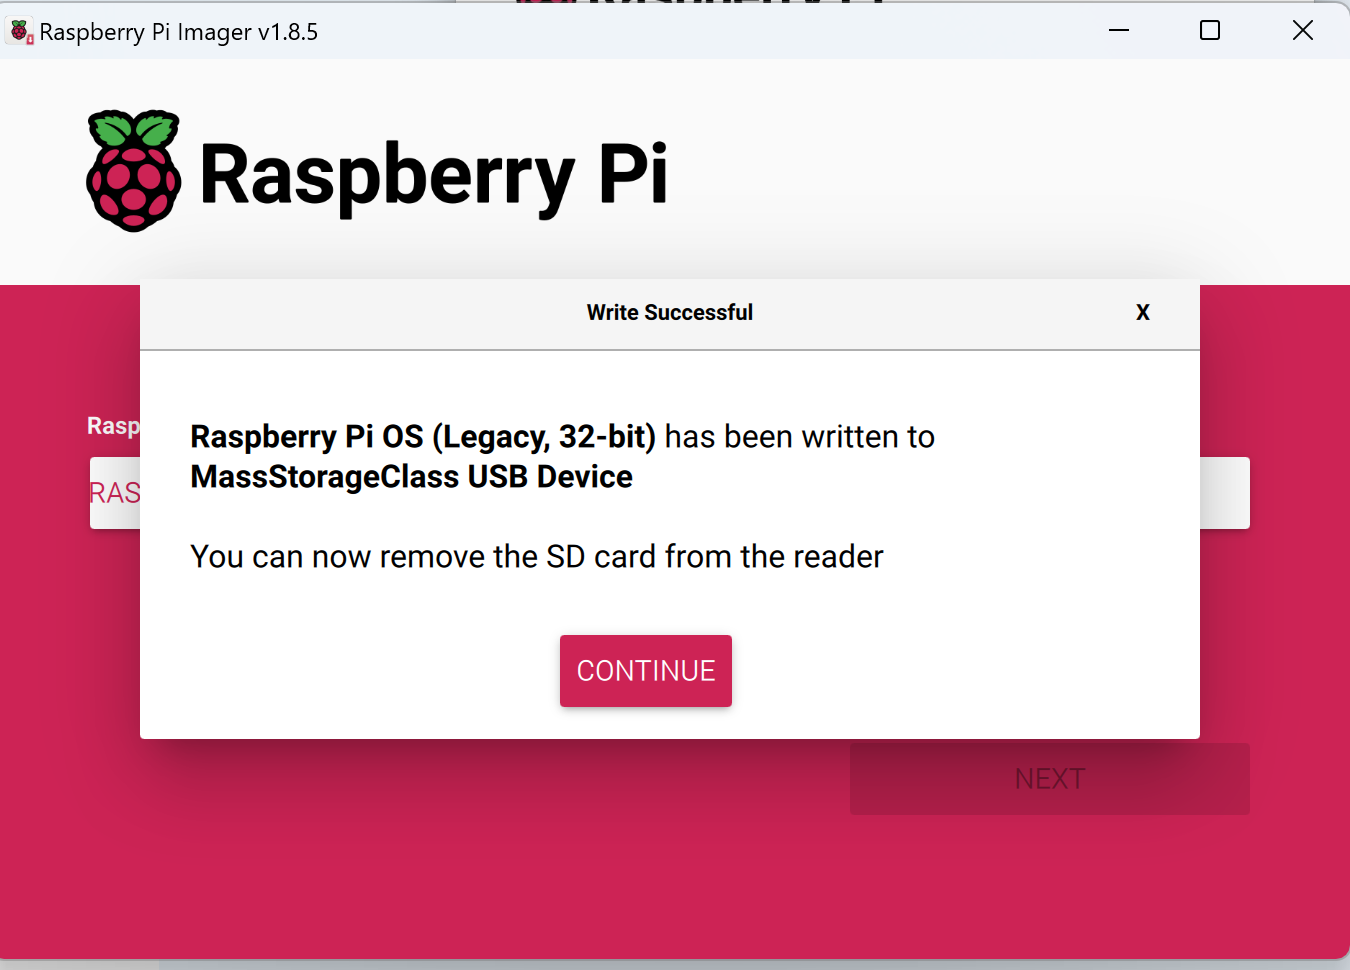
- Download and install Raspberry Pi Imager from the (official website)[https://www.raspberrypi.com/software/] and use that to write the Raspberry Pi OS (Legacy 32 bit) on an (empty) SD-Card. As seen in the images below, you can select the OS straight from the imager itself.
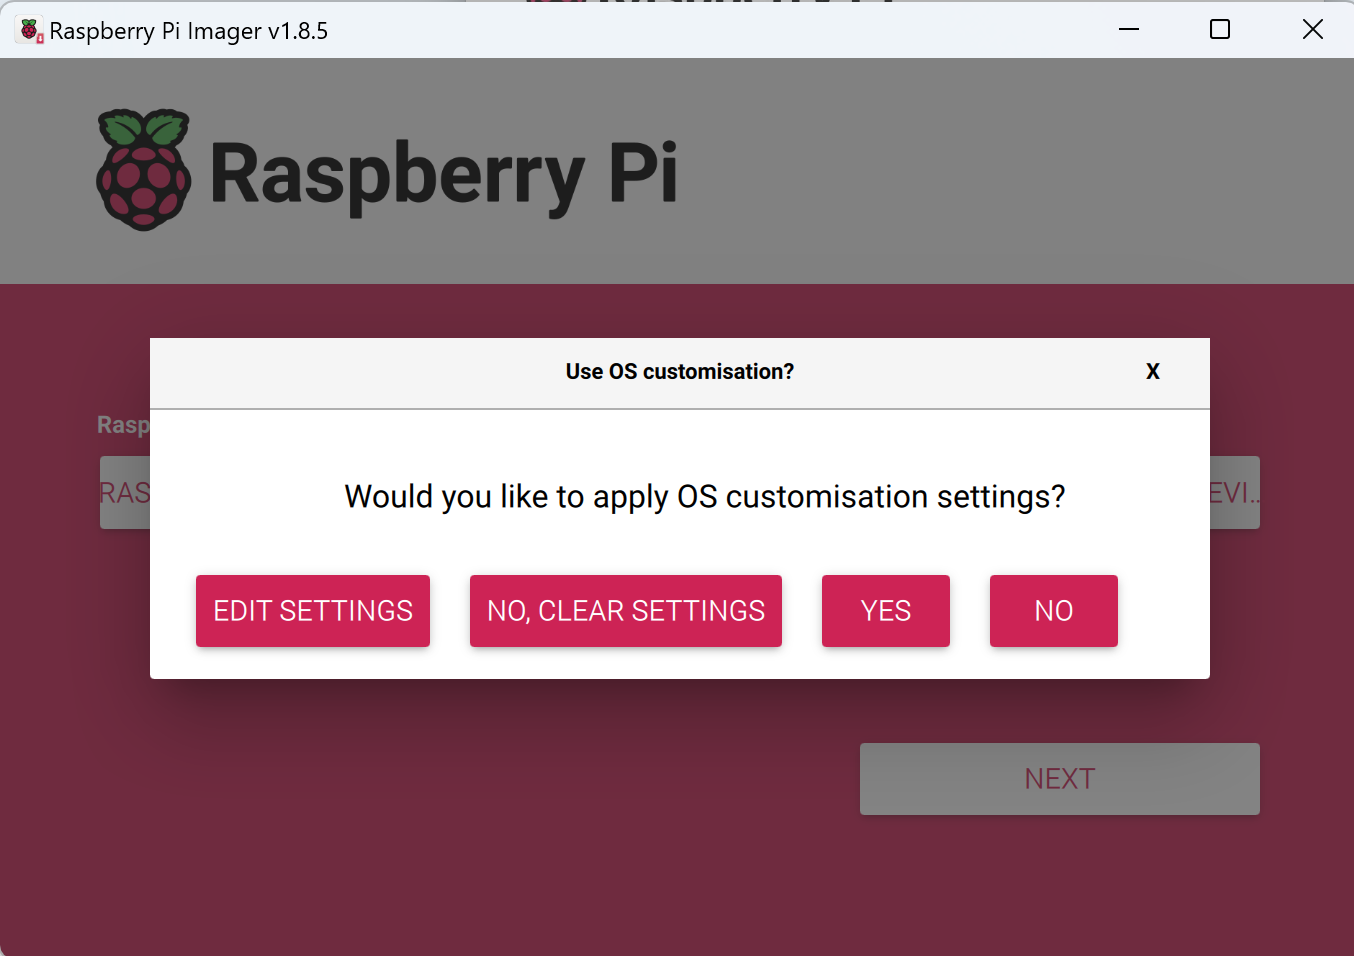
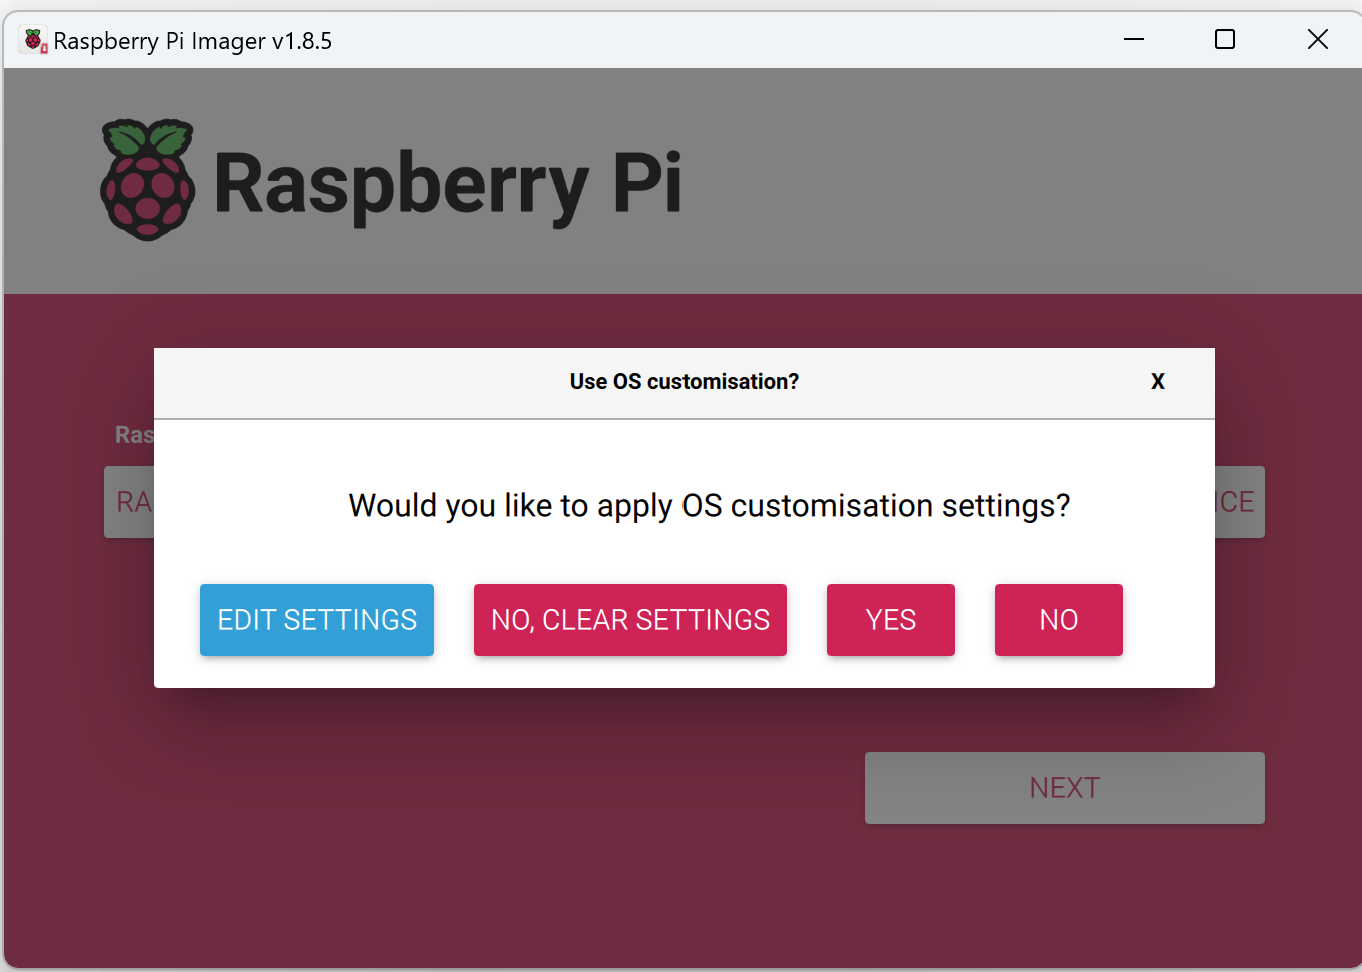
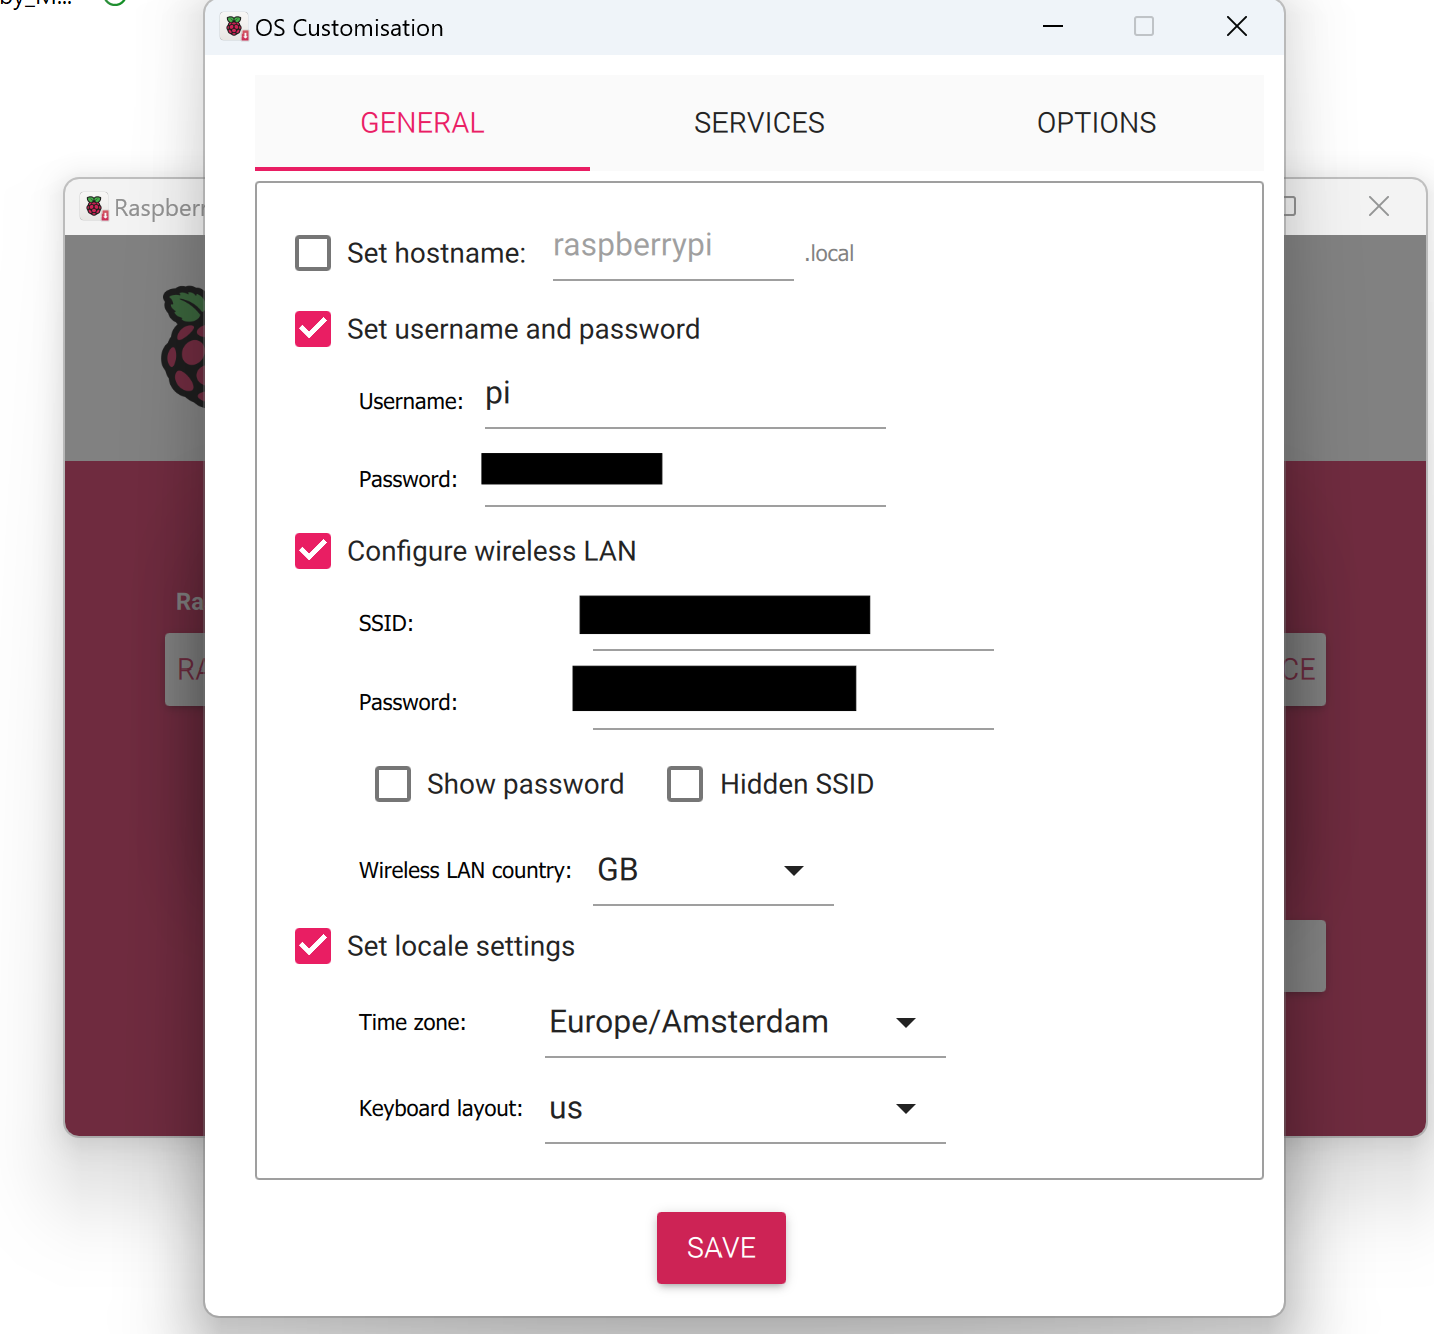
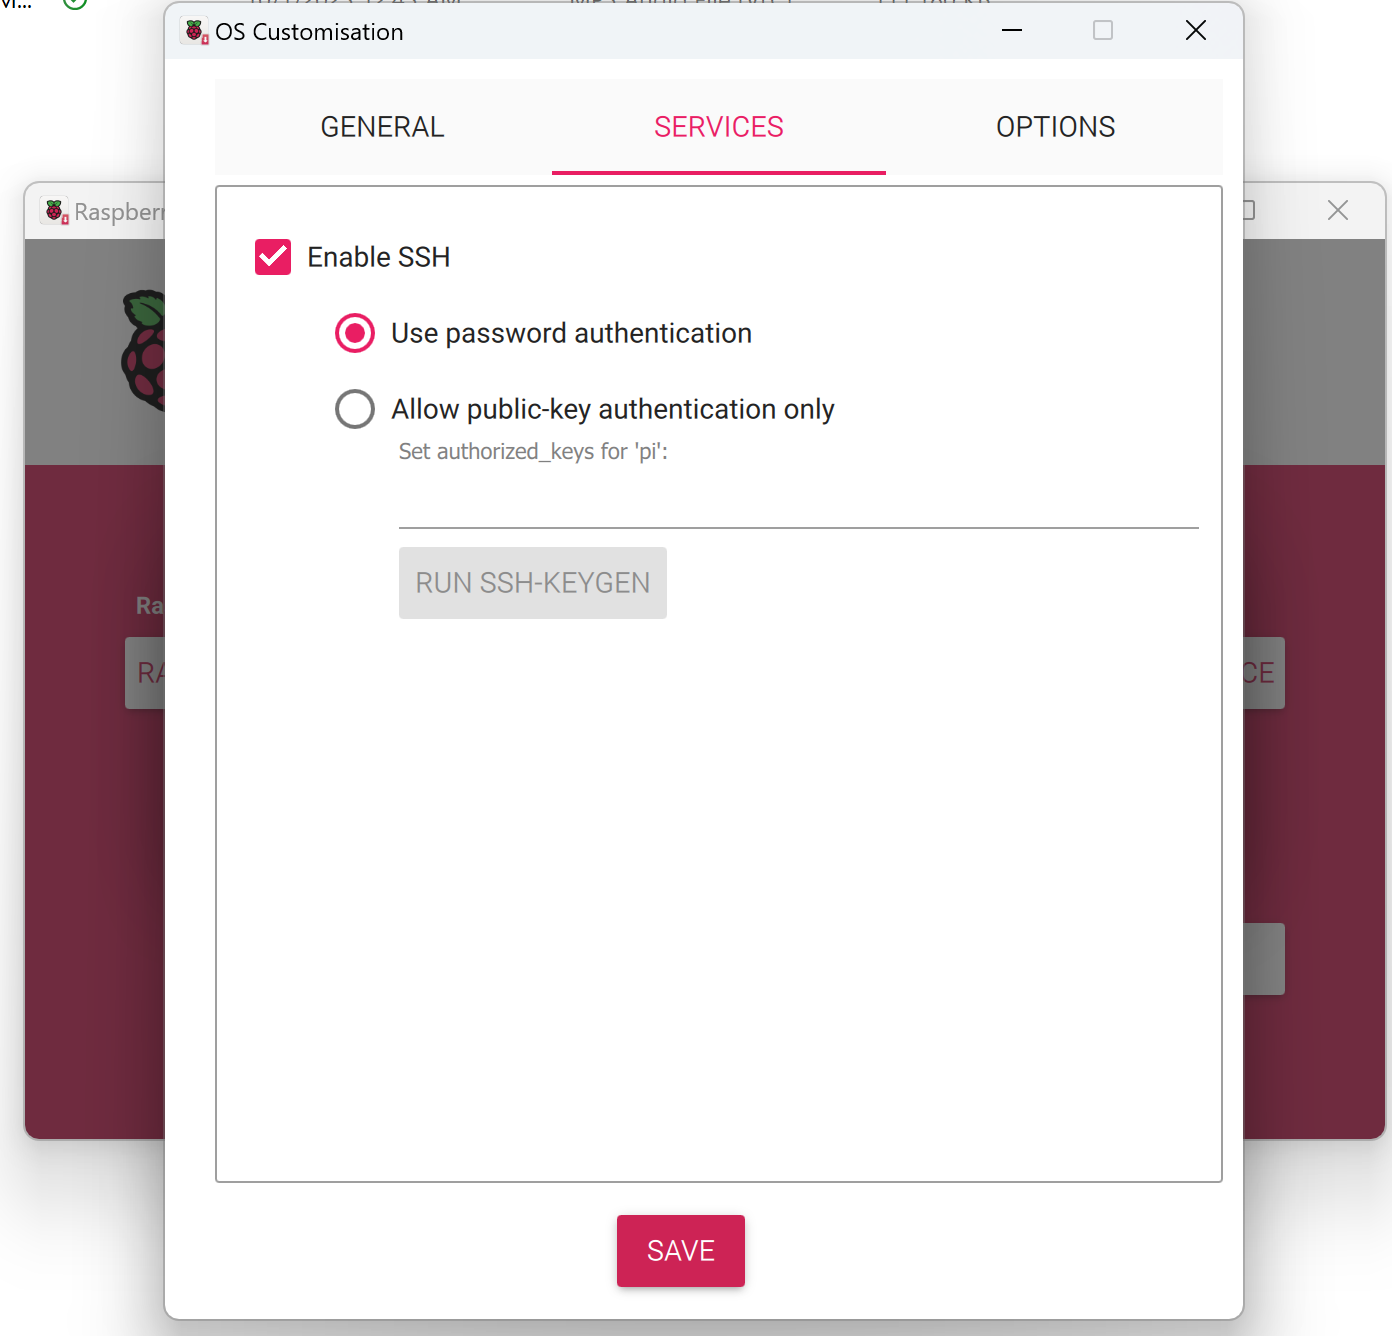
(Option A: Settings Using Imager) Using the Raspberry Pi Imager, we can choose to customize the wifi settings, username and password and enable ssh as shown below.
__ NOTE__: You must use the standard username pi. Otherwise, many functionalities will not work.
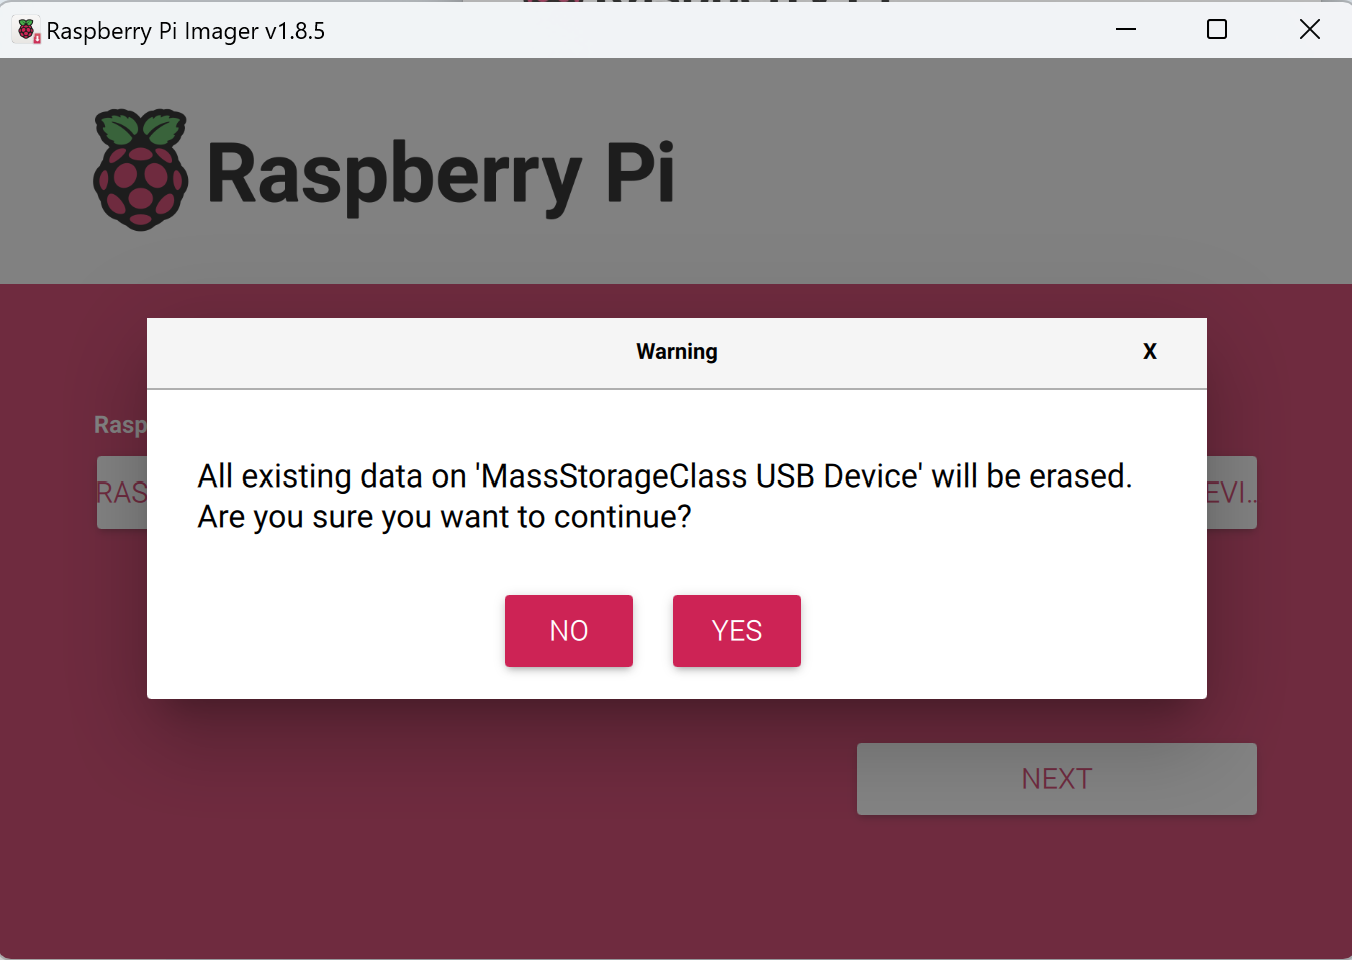
Once the OS and settings have been saved to the SD card, you can now boot your Raspberry Pi and connect it.
There are several ways to find out which IP your Raspberry Pi received. For this particular test, a display was used to connect to the Raspberry Pi to enable the wireless interface and identify the IP address issued.
(Option B: Settings using Display) Ideally, with the aforementioned settings, your Pi should connect to WiFi once booted but if that is not the case, the following command can be used to perform initial setup of the Pi. To access terminal when using a display, navigate to the application menu, under *Accessories > Terminal.
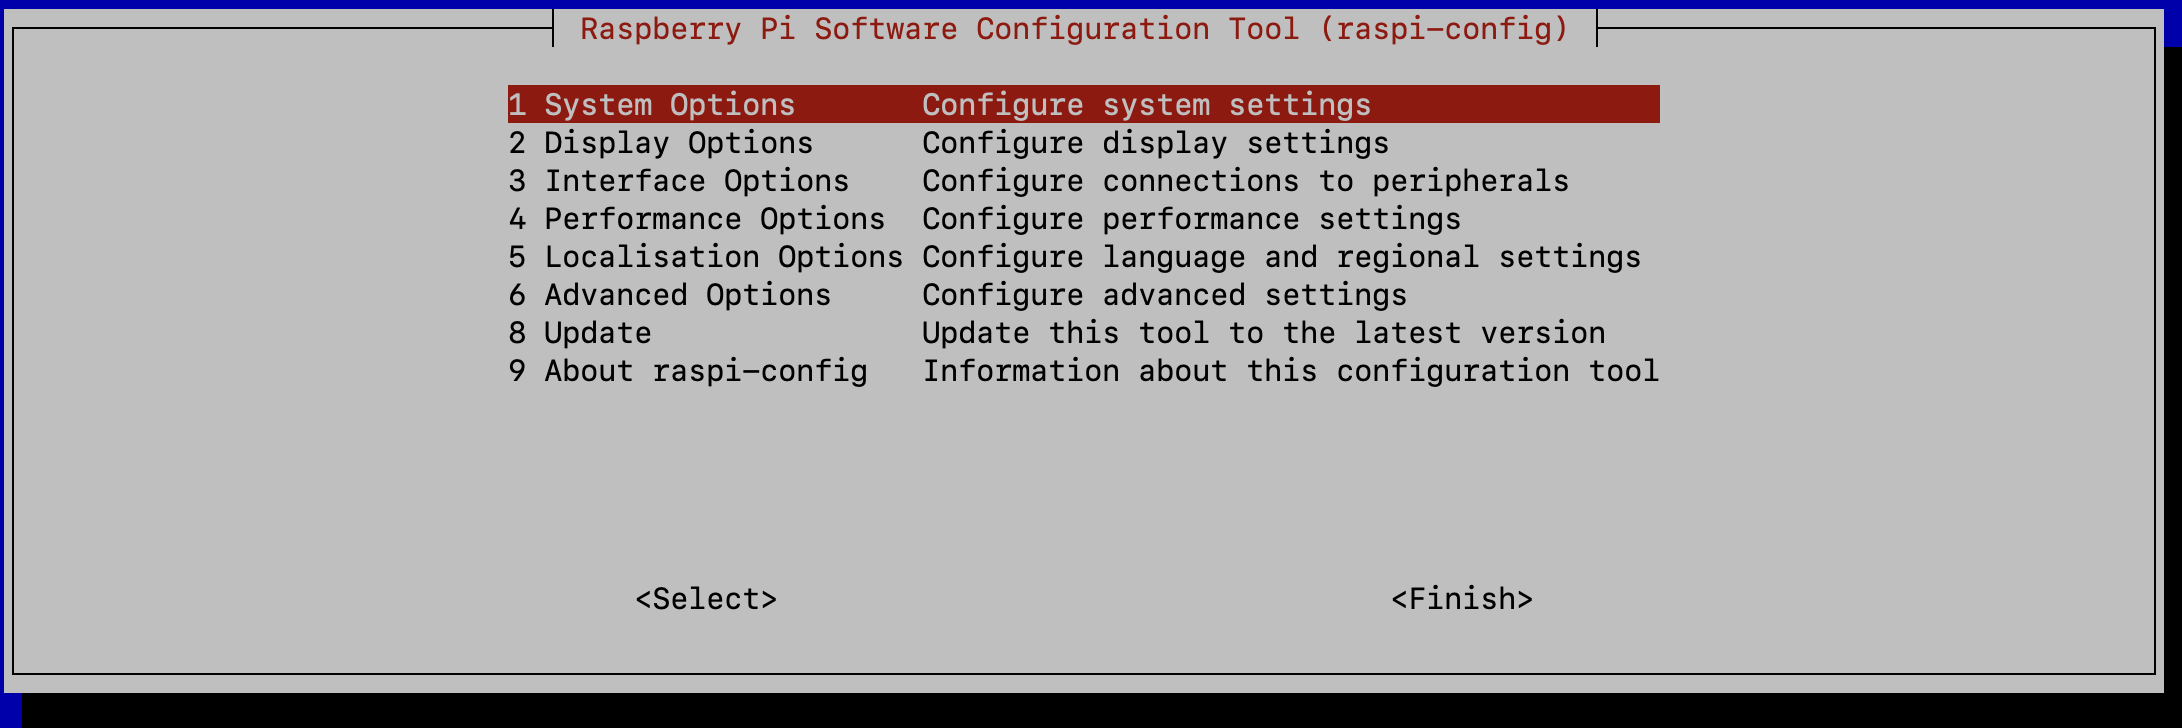
sudo raspi-config
This command brings up menu options to choose from.
- Select
1 – System Options - Select
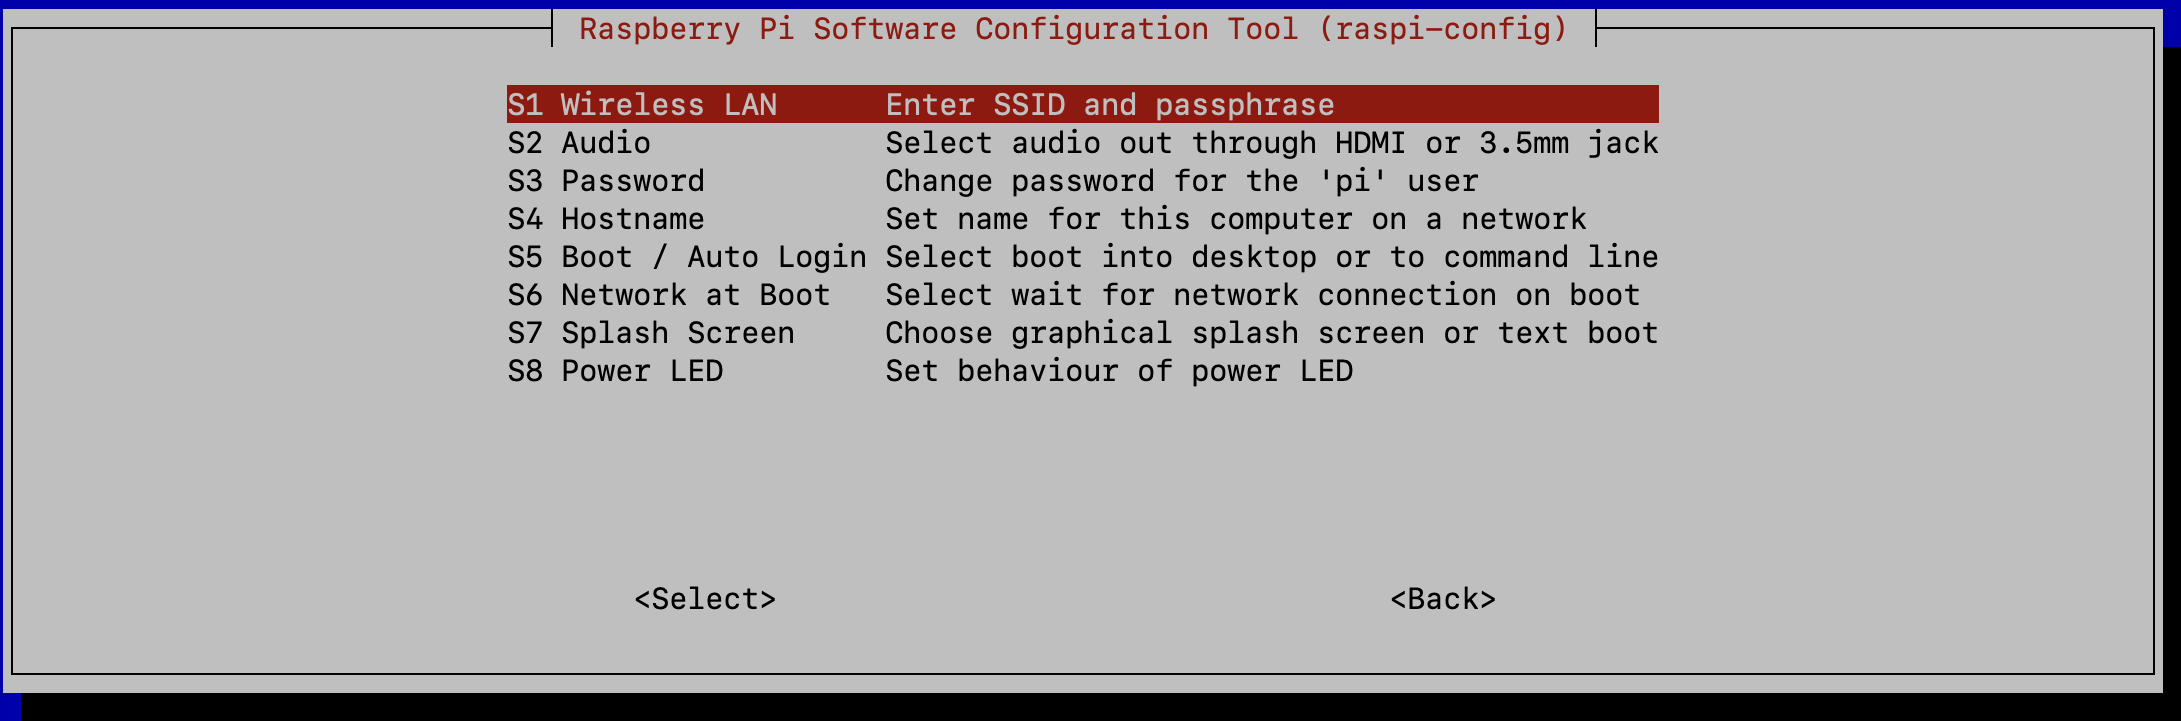
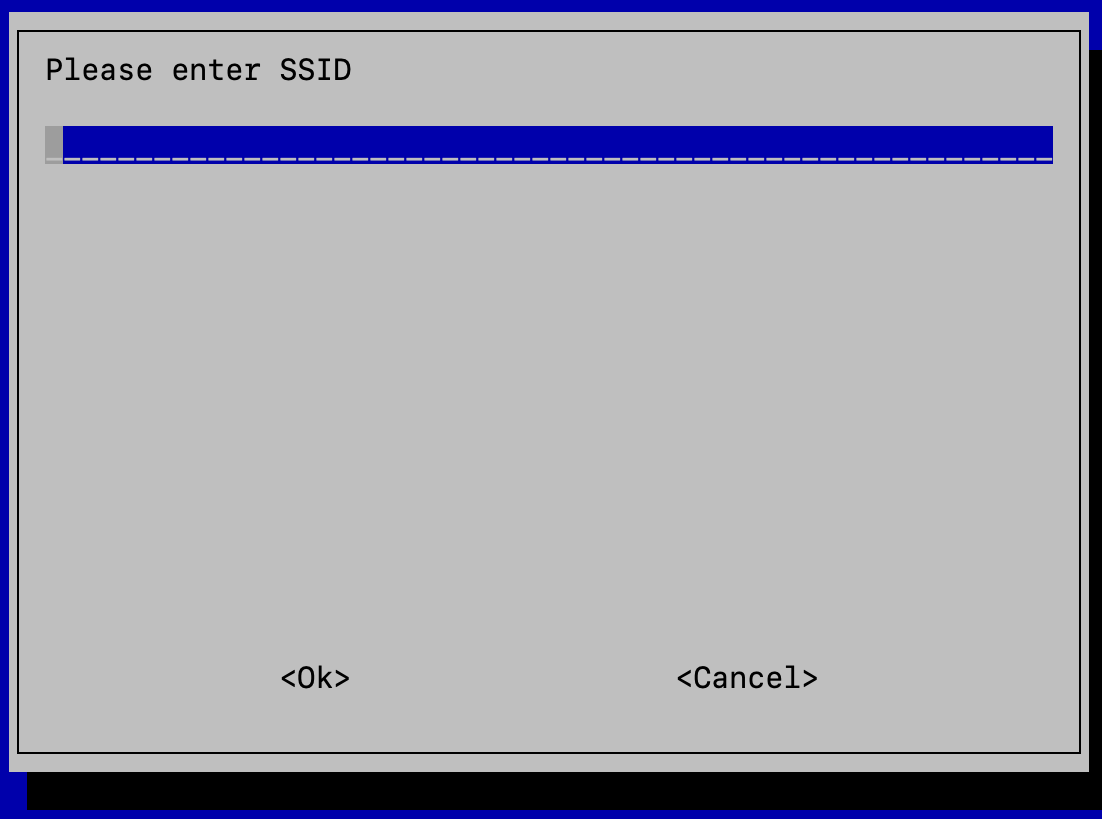
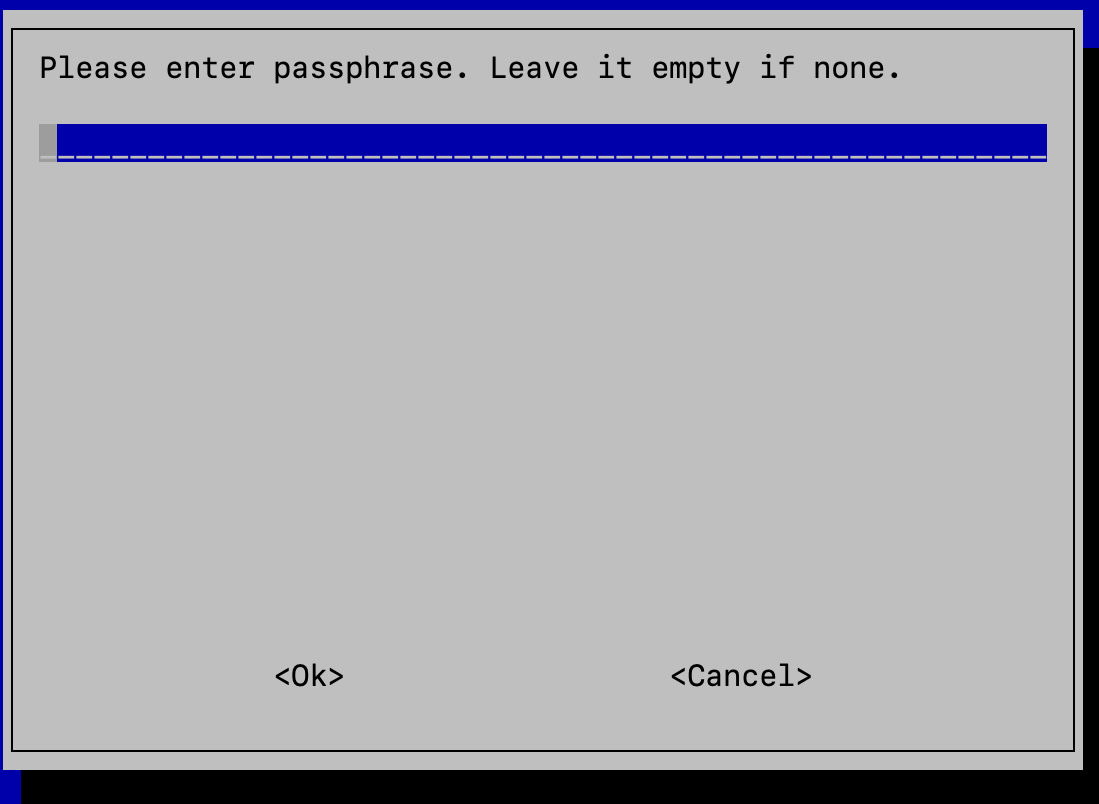
S1 – Wireless LAN - Fill in your WLAN network name under
Please enter SSID - Fill in your WLAN Password under
Please enter passphrase
Apply the settings and select Finish. To view the IP address of your device, go back to the terminal and type ifconfig can be used.
ifconfig
Step 2: Enable SSH (optional)
There are a couple of ways you can use to enable SSH for remote administration.
Option A: Headless (with Imager)
As we saw in option A of step 1 above, when you write the Raspberry Pi OS on your SD-Card you can enable SSH during the writing process. You can access the extended menu by entering shift + command + X (windows: shift + control + X)
From this interface, you can enable SSH and enter your password or public-key to make the authenticating process while connecting easier.
Option B: With Display
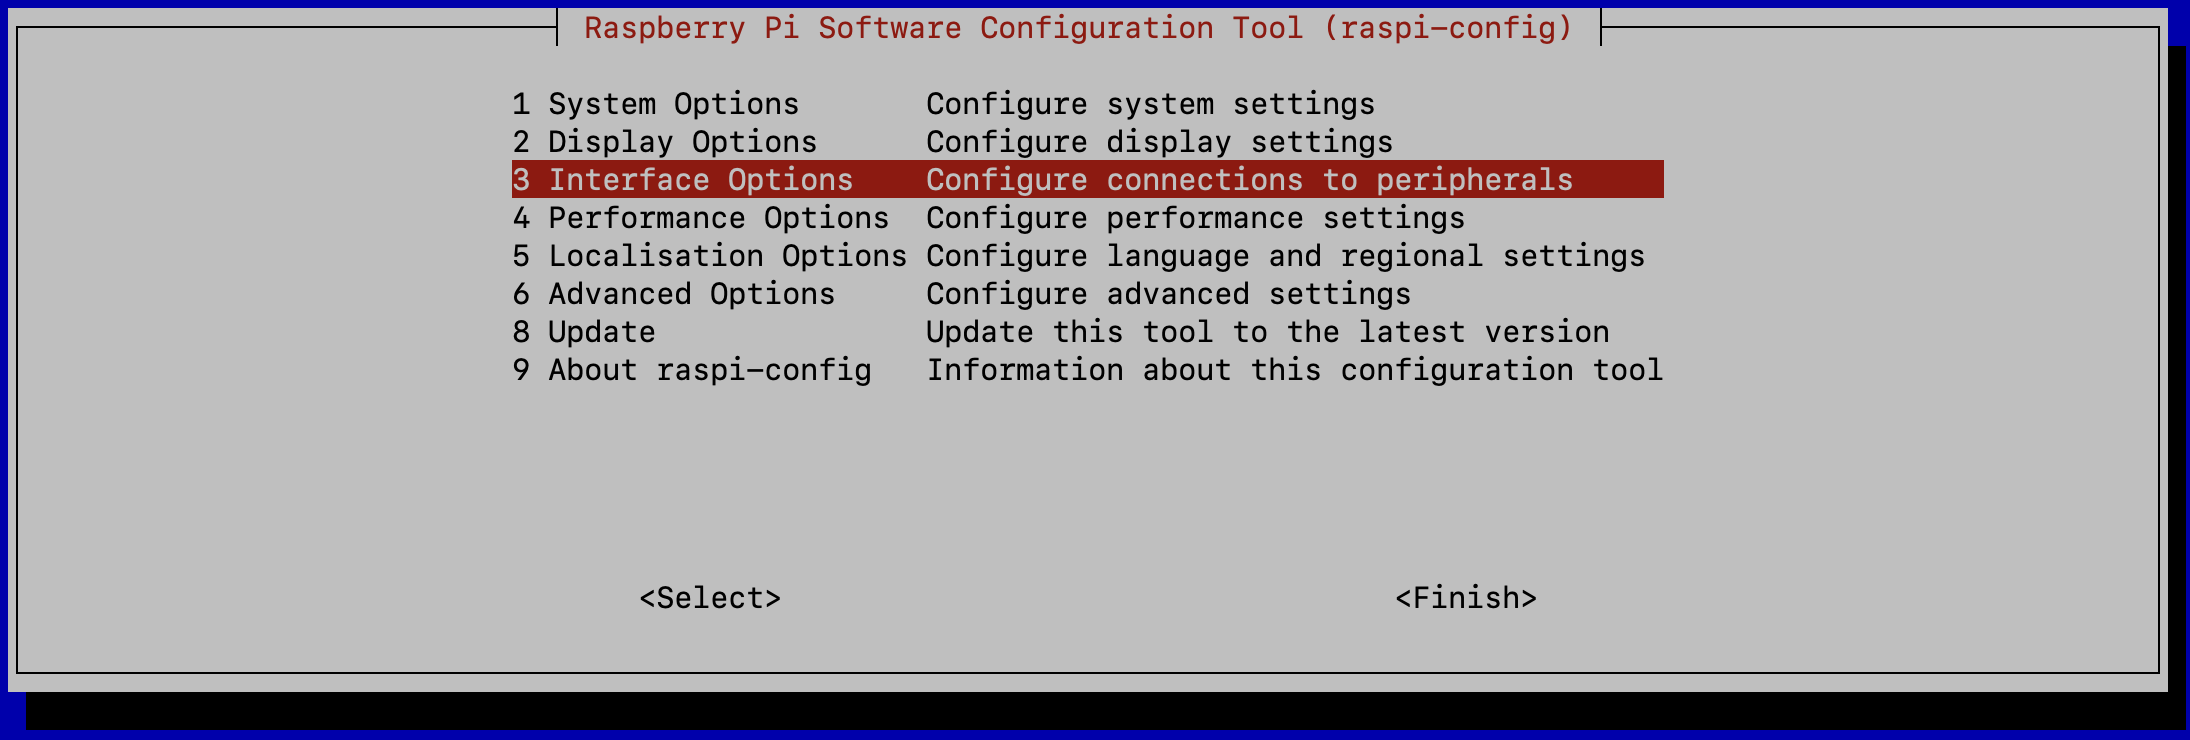
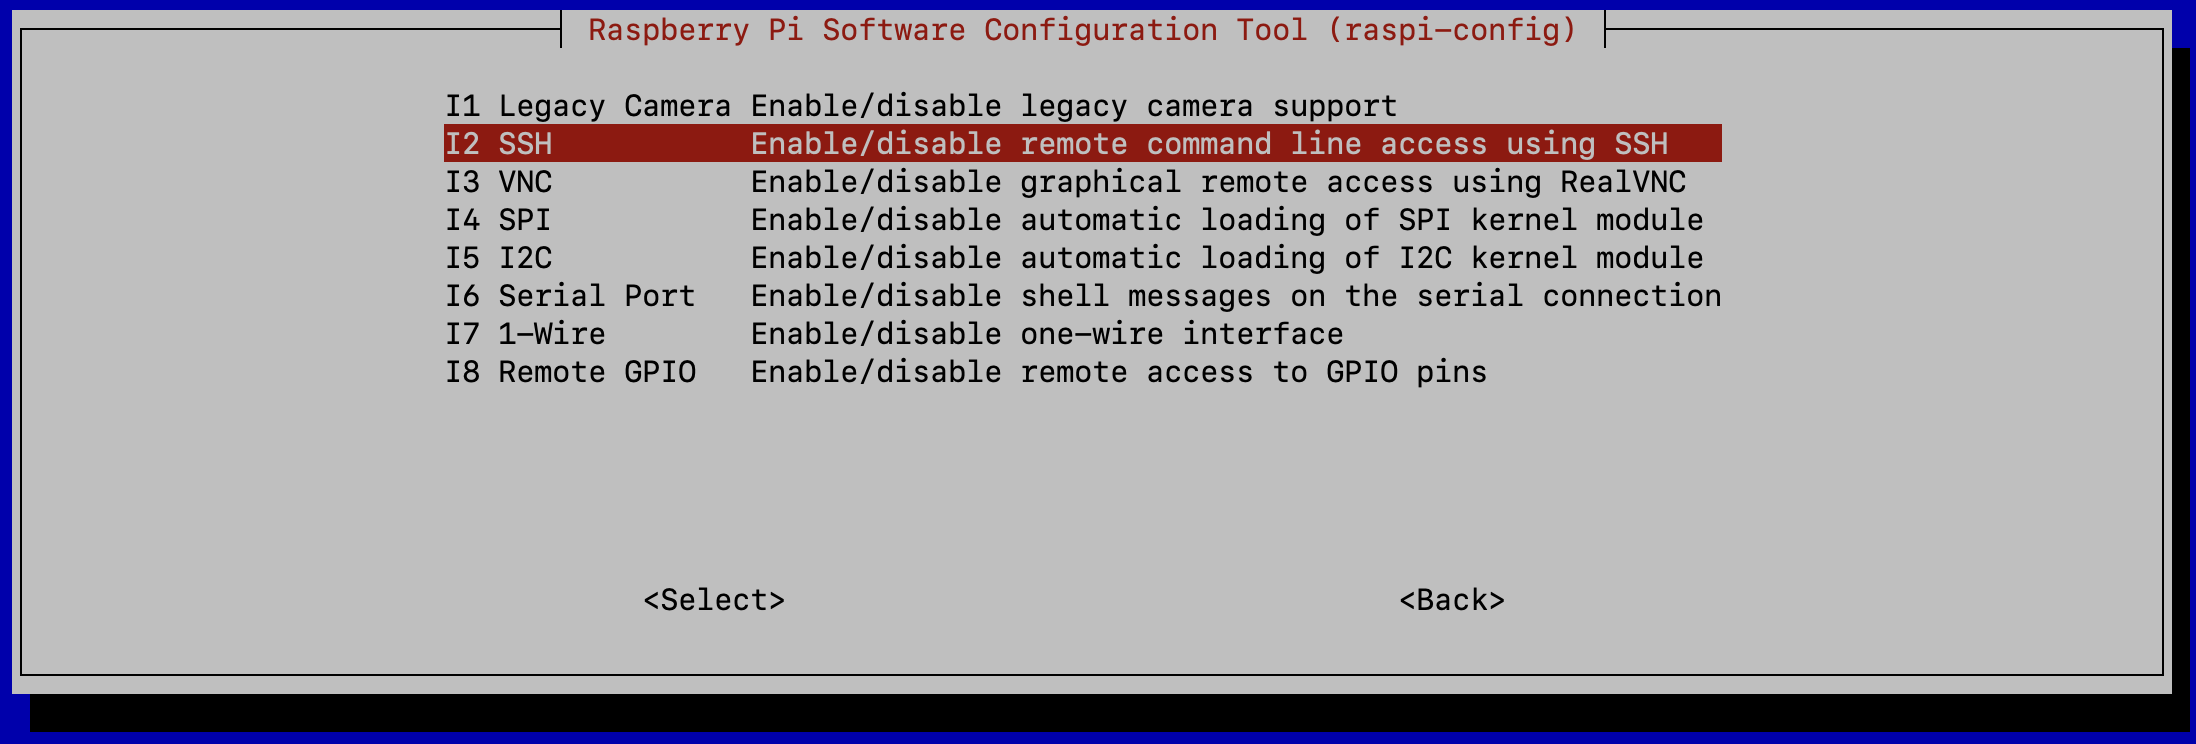
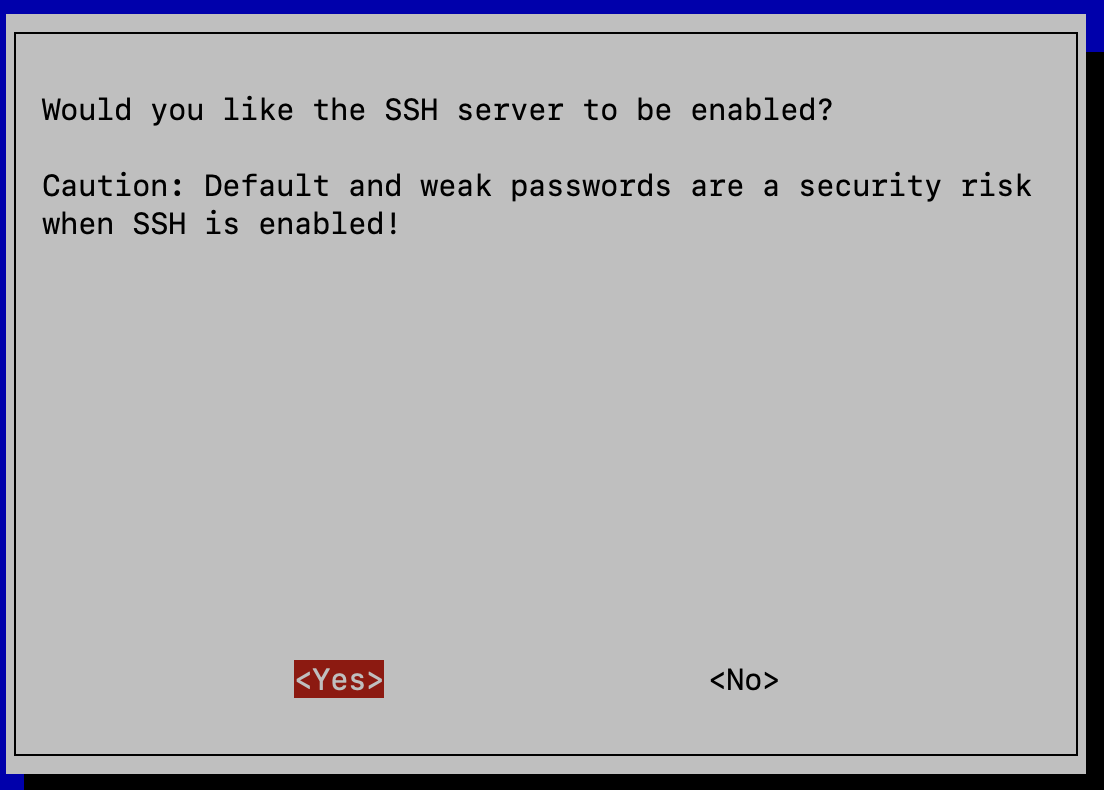
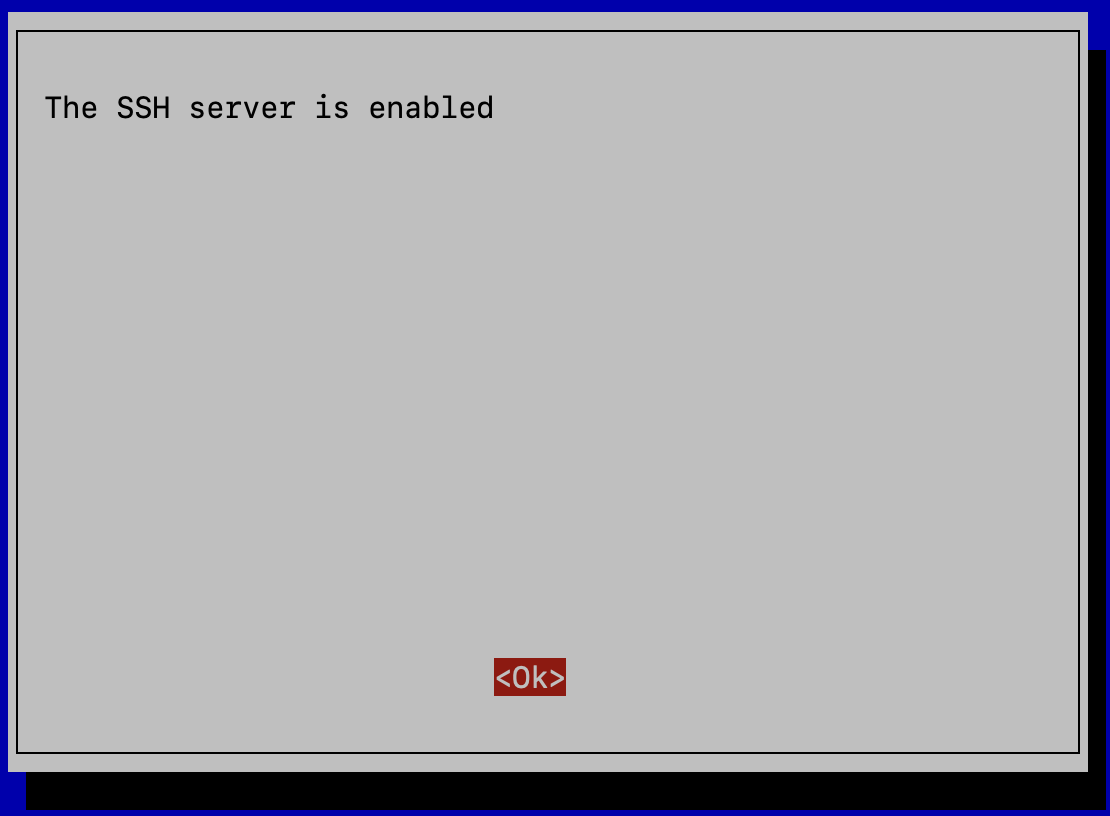
When using a display, to access the terminal on your Raspberry Pi, navigate to the application menu, under Accessories > Terminal.
sudo raspi-config
- Select
3 – Interface options - Select
I2 – SSH - Click
Yes
Option C: Headless (add file)
After writing the Raspberry Pi Image on your SD-Card you’ll need to add a file named “ssh” in your boot partition (boot register) of your SD-Card, which you can access on your personal computer. When you added the file, you can now boot your Raspberry Pi.
Let’s now get the IP address from the Raspberry Pi so that we can connect. You can find the address in your Router’s DHCP lease allocation table or if you use a display, you can get your IP address by typing ifconfig in your terminal.
ifconfig
With the IP address, we are now ready to connect remotely to the Raspberry Pi. Open a terminal on your remote device and ssh to the IP address using the username pi
ssh pi@/{your IP address}
Example:
ssh pi@192.168.1.1
You are presented with a dialogue. You need to agree that you want to connect your devices and enter your Raspberry Pi password. By default, the password is raspberry. Now you should be able to use SSH moving forward.
Step 3: Installing RasQberry
Prerequisites
It is expected that both steps 1 and 2 have been completed before starting this section. If both steps 1 and 2 are done, then the following statements hold true:
- Installed Raspberry Pi OS Bullseye (Legacy 32 bit) with desktop as advised in step 1
- Made sure that you are using the default username
pias advised in step 1
Let’s now navigate to the home directory of the user pi. __ NOTE__: Not doing this will result in an error while installing and using the RasQberry.
You can do that simply by typing cd then the user’s path.
cd /home/pi/
You can check which location you are currently in by running the pwd command. Output should be as shown below.
$ pwd
/home/pi
Now we are finally ready to install RasQberry in just a few moments!
Downloading the RasQberry OS
The recommended way to get the OS is using wget command. Open the terminal/ssh window on your Raspberry Pi and run the following command to install from the master branch.
wget https://github.com/JanLahmann/RasQberry/raw/master/RasQ-init.sh
Installing the RasQberry OS
The command above downloads the script into the user’s pi home directory as seen below.
pi@raspberrypi:~ $ pwd
/home/pi
pi@raspberrypi:~ $ ls -l | grep RasQ-init.sh
-rw-r--r-- 1 pi pi 3483 Aug 18 14:42 RasQ-init.sh
To start the installation, we need to run the script. The script can be run with specific parameters . ./RasQ-init.sh <devoption> <branch> <gituser> where:
- The
devoptionparameter specifies which development version of the RasQberry repository to install. Specifydevoption=1for development branch ordevoption=0to download from production. - The
branchparameter is used to specify the branch you want to use. Examplebranch=masterwill download from the master branch. - The
gituserparameter is used to specify the GitHub user to clone the RasQberry repository from. Examplegituser=JanLahmannwill download fromJanLahmann’s repository.
If you choose to run the script without parameters, then the following default parameters will be used devoption=0, branch=master and gituser=JanLahmann.
For the test, we’ll be downloading from the master branch, we want the production version in JanLahmann’s repository. We can run it with options like this . ./RasQ-init.sh 0 master JanLahmann but since that matches the default parameters, let’s simply run the script.
. ./RasQ-init.sh
This command downloads and starts the RasQberry Configuration Tool (rasqberry-config) in your terminal. It is similar to the well-known raspi-config and can also be used for some basic configurations.
Once the script finishes, the SSH connection is closed for the following reason.
**********************************************************************
/boot/config.txt will be modified to ensure 32 bit kernel being used
rebooting after modification of /boot/config.txt
After reboot, please login and restart the script RasQ-init.sh
**********************************************************************
We can now SSH back into the host and restart the script to start setting up.
Before installing RasQberry
pi@raspberrypi:~ $ uname -a
Linux raspberrypi 6.1.21-v8+ #1642 SMP PREEMPT Mon Apr  3 17:24:16 BST 2023 aarch64 GNU/Linux
After installing RasQberry
pi@raspberrypi:~ $ uname -a
Linux raspberrypi 6.1.21-v7l+ #1642 SMP Mon Apr  3 17:22:30 BST 2023 armv7l GNU/Linux
Step 4: RasQberry Setup with touch display
Let’s SSH back into the Raspberry Pi restart the RasQ-init.sh script again.
. ./RasQ-init.sh
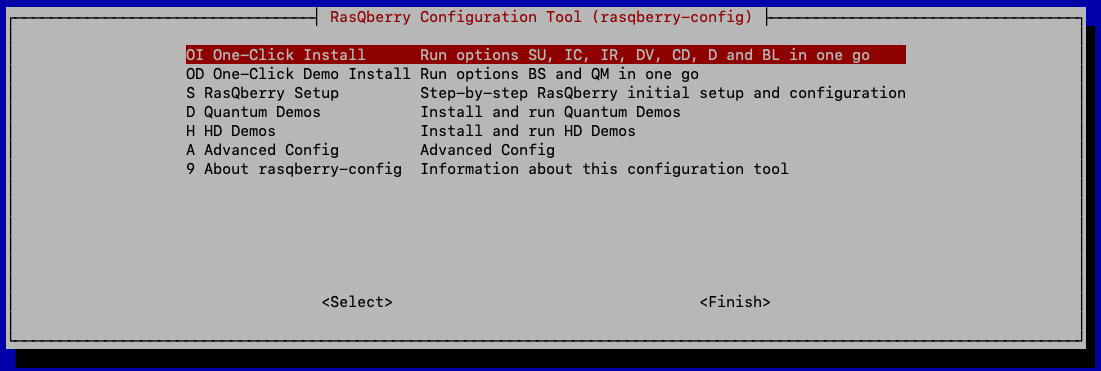
This starts the RasQberry Configuration Tool (rasqberry-config) in the terminal. The tool is similar to the well-known raspi-config and can also be used for some basic configurations. We are presented with the below menu.
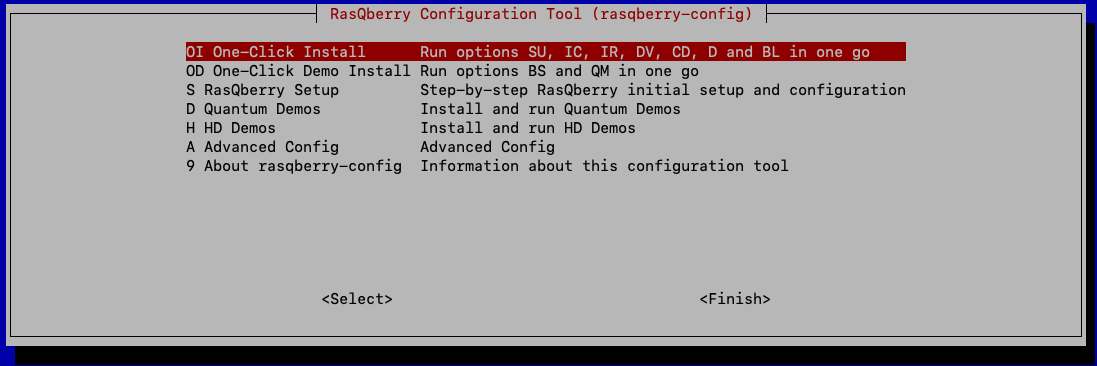
Instead of installing each component individually, a quick way to get started is with the one click installation options.
Step 4a: One-Click Install with touch display
From the RasQberry Configuration Tool (rasqberry-config):
- Select
OI – One-Click Install. This will run options SU, IC, IR, DV, CD, D and BL in one go.
The script ran for around 15 or so minutes. Here is a sample of some of the output that is seen when the script runs showing versions that were installed.
...
Successfully installed python-dotenv-0.21.0
...
Successfully installed rpi-ws281x-5.0.0
...
Successfully installed pip-24.2
...
Successfully installed arraylias-0.1.1 asteval-1.0.2 asttokens-2.4.1 beautifulsoup4-4.12.3 charset-normalizer-3.3.2 comm-0.2.2 contourpy-1.2.1 cycler-0.12.1 decorator-5.1.1 dill-0.3.8 docplex-2.28.240 exceptiongroup-1.2.2 executing-2.0.1 fastdtw-0.3.4 fonttools-4.53.1 frozendict-2.4.4 h5py-3.11.0 importlib-resources-6.4.3 inflection-0.5.1 ipython-8.18.1 ipywidgets-8.1.3 joblib-1.4.2 jupyterlab-widgets-3.0.11 kiwisolver-1.4.5 lmfit-1.3.2 lxml-5.3.0 matplotlib-3.9.2 matplotlib-inline-0.1.7 more-itertools-10.4.0 mpmath-1.3.0 multiset-3.1.0 multitasking-0.0.11 nasdaq-data-link-1.0.4 networkx-3.2.1 numpy-2.0.1 packaging-24.1 pandas-2.2.2 pbr-6.0.0 peewee-3.17.6 platformdirs-4.2.2 ply-3.11 prompt-toolkit-3.0.47 pure-eval-0.2.3 pydot-3.0.1 pylatexenc-2.10 pyparsing-3.1.2 pyspnego-0.11.1 python-dateutil-2.9.0.post0 pytz-2024.1 pyyaml-6.0.2 qiskit-0.44.0 qiskit-algorithms-0.3.0 qiskit-dynamics-0.5.1 qiskit-experiments-0.5.4 qiskit-finance-0.4.0 qiskit-ibm-experiment-0.4.7 qiskit-machine-learning-0.7.2 qiskit-nature-0.7.2 qiskit-optimization-0.6.1 qiskit-terra-0.25.0 requests-2.32.3 requests-ntlm-1.3.0 rustworkx-0.15.0 scikit-learn-1.4.2 scipy-1.13.1 seaborn-0.13.2 stack-data-0.6.3 stevedore-5.2.0 sympy-1.13.2 threadpoolctl-3.5.0 traitlets-5.14.3 typing-extensions-4.12.2 tzdata-2024.1 uncertainties-3.2.2 wcwidth-0.2.13 websocket-client-1.8.0 widgetsnbextension-4.0.11 yfinance-0.2.41 zipp-3.20.0
...
Successfully installed ibm-quantum-widgets-1.0.3
qiskit                  0.44.0
qiskit-algorithms       0.3.0
qiskit-dynamics         0.5.1
qiskit-experiments      0.5.4
qiskit-finance          0.4.0
qiskit-ibm-experiment   0.4.7
qiskit-machine-learning 0.7.2
qiskit-nature           0.7.2
qiskit-optimization     0.6.1
qiskit-terra            0.25.0
...
Successfully installed Kivy-Garden-0.1.5 Pillow-9.2.0 PySocks-1.7.1 attrs-24.2.0 backcall-0.2.0 celluloid-0.2.0 certifi-2024.7.4 ewmh-0.1.6 h11-0.14.0 ipython-8.5.0 kivy-2.1.0 matplotlib-3.6.0 numpy-1.23.3 outcome-1.3.0.post0 pickleshare-0.7.5 python-xlib-0.33 rpi_ws281x-4.3.4 selenium-4.4.3 sense_hat-2.4.0 sniffio-1.3.1 sortedcontainers-2.4.0 tqdm-4.66.5 trio-0.26.2 trio-websocket-0.11.1 webdriver-manager-3.8.3 wsproto-1.2.0
...
Successfully installed anyio-4.4.0 argon2-cffi-23.1.0 argon2-cffi-bindings-21.2.0 arrow-1.3.0 async-lru-2.0.4 babel-2.16.0 bleach-6.1.0 cffi-1.17.0 debugpy-1.8.5 defusedxml-0.7.1 fastjsonschema-2.20.0 fqdn-1.5.1 httpcore-1.0.5 httpx-0.27.0 importlib-metadata-8.2.0 ipykernel-6.29.5 isoduration-20.11.0 jinja2-3.1.4 json5-0.9.25 jsonpointer-3.0.0 jsonschema-4.23.0 jsonschema-specifications-2023.12.1 jupyter-1.0.0 jupyter-client-8.6.2 jupyter-console-6.6.3 jupyter-core-5.7.2 jupyter-events-0.10.0 jupyter-lsp-2.2.5 jupyter-server-2.14.2 jupyter-server-terminals-0.5.3 jupyterlab-4.2.4 jupyterlab-pygments-0.3.0 jupyterlab-server-2.27.3 markupsafe-2.1.5 mistune-3.0.2 nbclient-0.10.0 nbconvert-7.16.4 nbformat-5.10.4 nest-asyncio-1.6.0 notebook-7.2.1 notebook-shim-0.2.4 overrides-7.7.0 pandocfilters-1.5.1 prometheus-client-0.20.0 ptyprocess-0.7.0 pycparser-2.22 python-json-logger-2.0.7 pyzmq-26.1.0 qtconsole-5.5.2 qtpy-2.4.1 referencing-0.35.1 rfc3339-validator-0.1.4 rfc3986-validator-0.1.1 rpds-py-0.20.0 send2trash-1.8.3 terminado-0.18.1 tinycss2-1.3.0 tomli-2.0.1 tornado-6.4.1 types-python-dateutil-2.9.0.20240316 uri-template-1.3.0 webcolors-24.8.0
...
Successfully installed rise-5.7.1
...
Installed Kivy
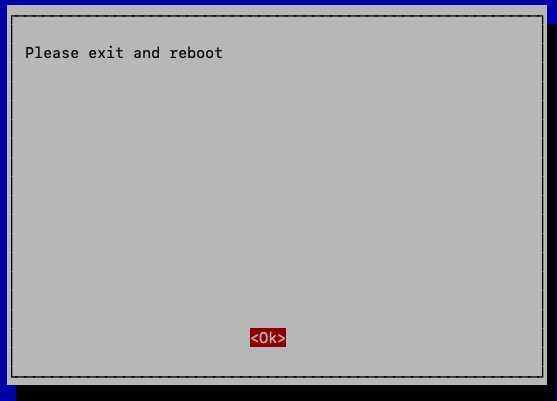
Once the installation is complete, the following screen is presented.
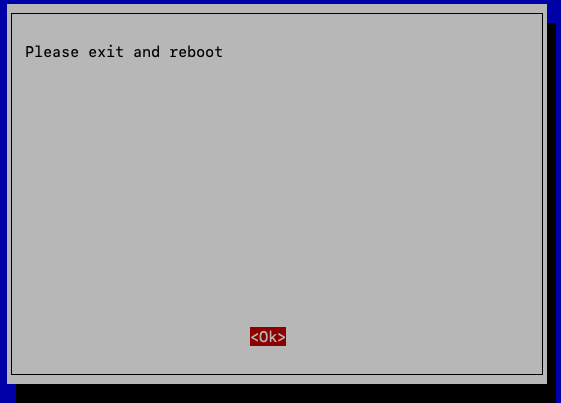
- Select
OKto exit and reboot. - If done, select
Finishto exit the setup.

Installation is now complete so Let’s now reboot the system. Using the display, we do see 3 icons on desktop
- BlochSphere_
- Fractals
- IBM Quantu_
At this point, the following tests were conducted and errors logged as shown below.
- Started Jupyter Lab - Works
- Started Jupyter Notebook - Works
- Started Kivy Interface - Nothing ** not sure what to see here**
- Started Qiskit - Terminal pops up showing installed versions
- Started Demos - Qoffe Maker (local) -
- ERROR from JupyterLab - Could not determine jupyterlab build status without nodejs
- ERROR from browser 127.0.0.1:8887/?token=super-secret-token - site cannot be reached.
- Started Demos - Qoffee Maker (dockerhub) -
- ERROR from terminal bash: line 1: cd: /home/pi/Qoffee-Maker/: No such file or directory
- ERROR from browser 127.0.0.1:8887/?token=super-secret-token - site cannot be reached.
- Started Demos - Ambilights - Not sure what to expect but terminal popped up and exited.
- Started Demos - BlochSphere Demo - Works
- Started Demos - Clear LED Lights - Not sure what to expect
- Started Demos - Fractals - ERROR** - terminal popped up then exited - not sure what to expect BUT there seems to be an error printed out though too quickly for me to read it
- Started Demos - Lights - terminal popped up then exited - not sure what to expect
- Started Demos - RasQ-LED - ERROR** - terminal popped up then exited - not sure what to expect BUT there seems to be an error printed out though too quickly for me to read it
- Started HD Demos - Fun with Quantum Repo - Navigates to Jan’s repo regarding Fun with Quantum
- Started HD Demos - IBM Quantum Composer - Works
- Started HD Demos - Jupyter Notebook Fun with Quantum - A repo in Jupyter notebook is presented
- Started HD Demos - Jupyter Notebook Qiskit Tutorials - A repo in Jupyter notebook is presented
Step 4b: One-Click Demo Install with touch display
Incase you are not in the RasQberry Configuration Tool (rasqberry-config), you can restart it by running the following command from terminal. Make sure you are in the user’s pi home directory as mentioned in section 3 - Prerequisites.
. ./RasQ-init.sh
This command should bring up the RasQberry Configuration Tool (rasqberry-config) as shown below.
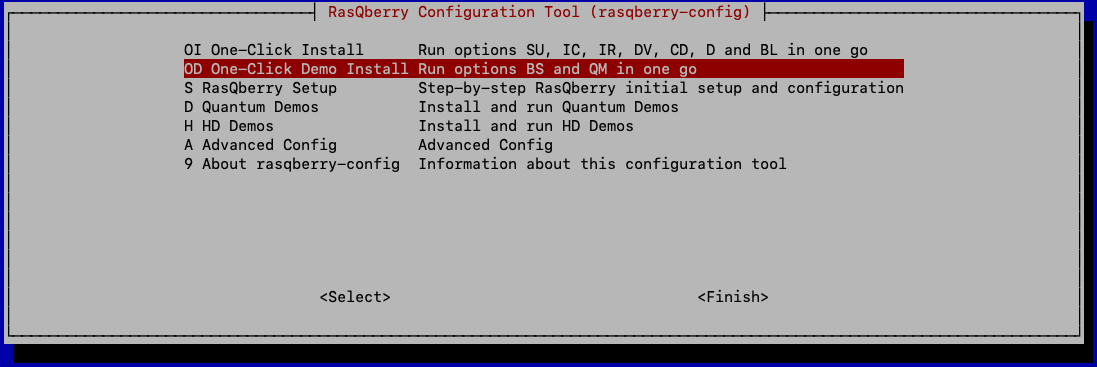
- Select
OD – One-Click Demo Install. This will run options BS and QM in one go.
The script ran for around 20 or so minutes. Here is a sample of some of the output that is seen when the script runs showing versions that were installed.
...
Bloch Sphere Demo
...
Using default tag: latest
latest: Pulling from janlahmann/qoffee-local
a9bec1cbb822: Pull complete
2d9e47cd2446: Pull complete
c8deb44fa055: Pull complete
e22aca21bac1: Pull complete
5e2b77379ff8: Pull complete
34d9cd5d7a59: Pull complete
e9c3deeb14ba: Pull complete
08c7319e69a7: Pull complete
6890c692090b: Pull complete
2974580f890d: Pull complete
23ca8f8c1a4a: Pull complete
615074ba800e: Pull complete
6ae87b1796b5: Pull complete
ccb3374881d8: Pull complete
0959a1c3f084: Pull complete
2bcfaeb60eaa: Pull complete
8933d59228e3: Pull complete
209d90cf1945: Pull complete
4c08d49d8265: Pull complete
8f39a76cf9c8: Pull complete
e65b374bac23: Pull complete
f82c1c38ff56: Pull complete
1d0ed2cb9d32: Pull complete
cbc267da8493: Pull complete
4c155293d688: Pull complete
ec5e31b2966b: Pull complete
5ca3ac41b3a8: Pull complete
1b8a3ea425ae: Pull complete
Digest: sha256:89733ac193e4a20148ec6f918834d4dd2d2074728c2442d1e34aaae2b08552ec
Status: Downloaded newer image for ghcr.io/janlahmann/qoffee-local:latest
ghcr.io/janlahmann/qoffee-local:latest
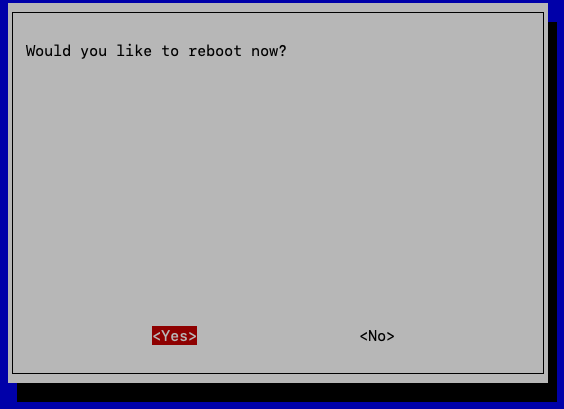
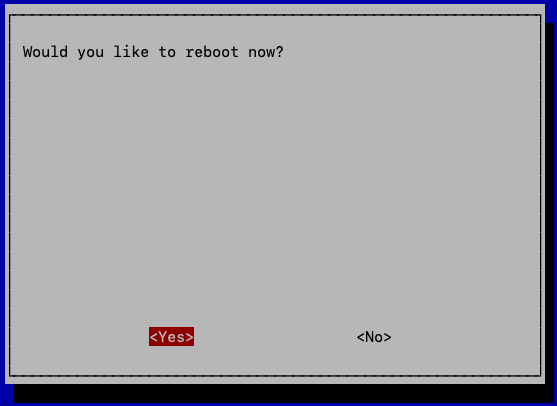
Once installation is complete, the screen below is presented requiring a reboot of the system.
- Select
OKto exit - Select
Finish - Select
Yesto reboot
After the reboot, an additional icon Qoffee Maker appears on display so we have a total of 4.
- BlochSphere_
- Fractals
- IBM Quantu_
- 1 Qoffee Maker
At this point, the following tests were conducted and errors logged as shown below.
- Started Jupyter Lab - seems to Work but need to test each notebook
- Ran the Fun with Quantum notebook `codebeispiele-Linux-Magazin
- ERROR:
Import Error /lib/arm-linux-gnueabihf/libm.so.6: version `GLIBC_2.35' not found ( required by /home/pi/.local/lib/python3.9/site-packages/qiskit/_accelerate.abi3.so)
- ERROR:
- Ran the Fun with Quantum notebook `codebeispiele-Linux-Magazin
- Started Jupyter Notebook - seems to Work but need to test each notebook
- Ran the Fun with Quantum - Quantum coin game
- ERROR: Import Error Cell In [1], line 3
- Ran the Fun with Quantum - Quantum coin game
- Started Demos - BlochSphere Demo - seems to Work
- Started Demos - Fractals - ERROR** - terminal popped up then exited - not sure what to expect BUT there seems to be an error printed out though too quickly for me to read it
- Started HD Demos - IBM Quantum Composer - seems to Work
- Need to figure out and test it
- Started Demos - Qoffee Maker (local) - seems to Work
- Ran each cell in qoffee.ipynb - seems to work
- ERROR: docplex is not officially supported on 32 bit
- In the terminal, I see a couple of permission errors but will get back to this
- Ran each cell in qoffee.ipynb - seems to work
- Started Kivy Interface - terminal pops then Nothing ** not sure what to see here**
- Started Qiskit - Terminal pops up showing installed versions
- Started Demos - Qoffee Maker (dockerhub) - not working although I see some downloads and pulls happening when I close the browser.
- ERROR from terminal bash: line 1: cd: /home/pi/Qoffee-Maker/: No such file or directory
- ERROR from browser 127.0.0.1:8887/?token=super-secret-token - site cannot be reached.
- ERROR v4l2_utils.cc(513) Could not open /dev/video…
- Started Demos - Ambilights - Not sure what to expect but terminal popped up and exited.
- Started Demos - Clear LED Lights - empty terminal pops up and nothing - Not sure what to expect
- Started Demos - Fractals - not sure what to expect BUT there seems to be an error printed out though too quickly for me to read it
- ERROR** - terminal popped up then exited
- Started Demos - Lights - terminal popped up then exited
- Started Demos - RasQ-LED - not sure what to expect BUT there seems to be an error printed out though too quickly for me to read it
- ERROR** - terminal popped up then exited
- Started HD Demos - Fun with Quantum Repo - Navigates to Jan’s repo regarding Fun with Quantum
- Need to test the jupyter notebooks
- Started HD Demos - Jupyter Notebook Fun with Quantum - seems to work - A repo in Jupyter notebook is presented
- Tested the GHZ-Game Notebook
- ERROR -
Import Error: /lib/arm-linux-gnueabihf/libm.so.6: version `GLibc_2.25' not found ( required by /home/pi/.local/lib/python3.9/site-packages/qiskit/_accelerate.abi3.so) - Need to test the rest of the Notebooks
- ERROR -
- Tested the GHZ-Game Notebook
- Started HD Demos - Jupyter Notebook Qiskit Tutorials - seems to work - a repo in Jupyter notebook is presented
- Tested the start_here.ipynb notebook
- ERROR -
Import Error: /lib/arm-linux-gnueabihf/libm.so.6: version `GLibc_2.25' not found ( required by /home/pi/.local/lib/python3.9/site-packages/qiskit/_accelerate.abi3.so)
- ERROR -
- Tested the start_here.ipynb notebook
Step 5: Other Settings
Step 5a: Connecting via VNC
In addition to SSH, you can connect remotely to your Raspberry Pi via VNC. For this, you need to have a VNC Client installed on a different computer. For this test, the VNC client that was used was the realVNC Viewer.
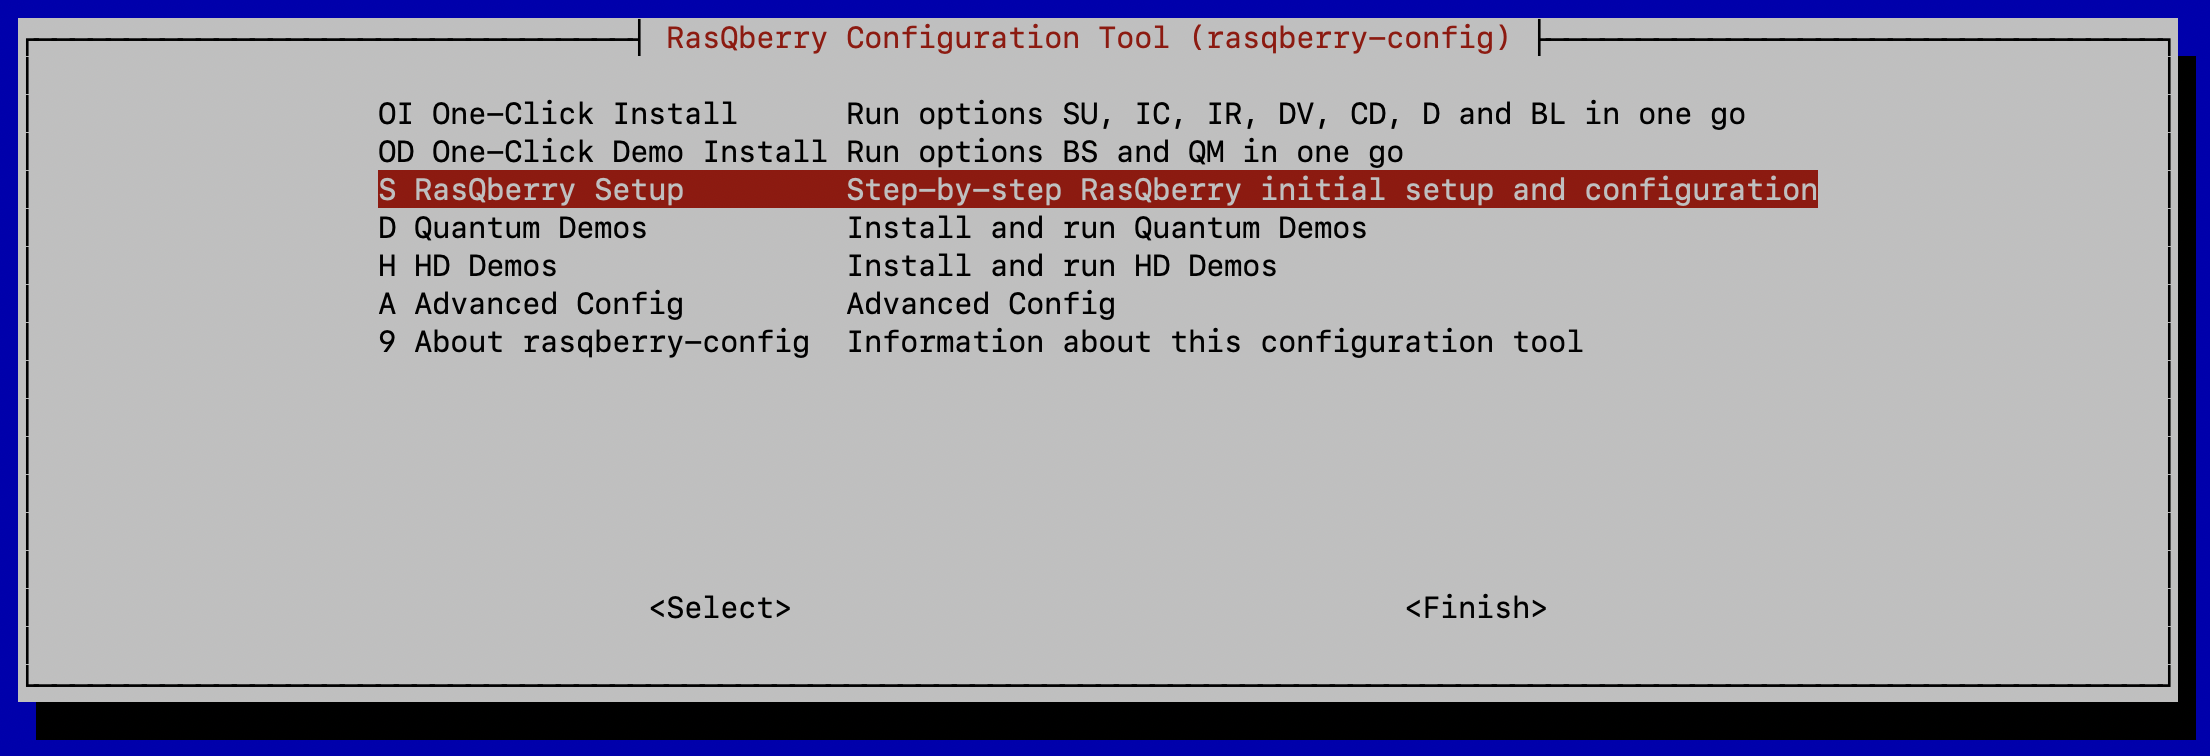
You then need to enable the vnc-server on the Raspberry Pi. To do this, start the RasQberry Configuration Tool (rasqberry-config) by running the following command from terminal. Make sure you are in the user’s pi home directory as mentioned in section 3 - Prerequisites.
. ./RasQ-init.sh
Then:
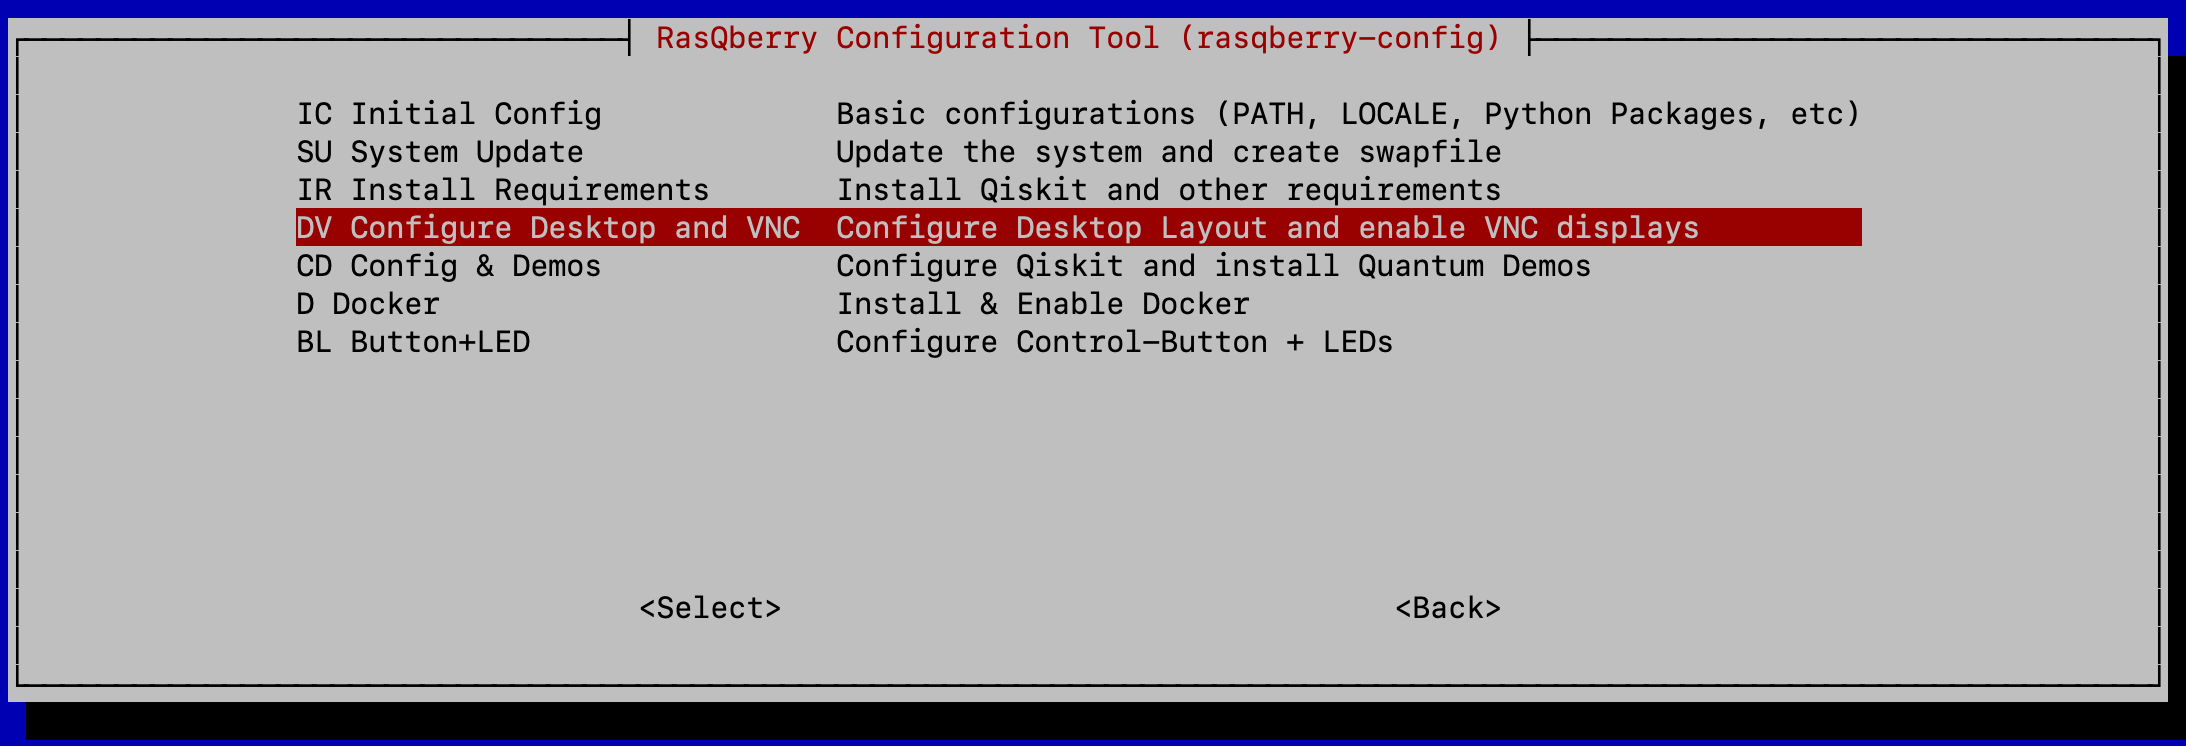
- Select
S - RasQberry Setup - Select
DV - Configure Desktop and VNCto configure Desktop Layout and enable VNC displays - Click
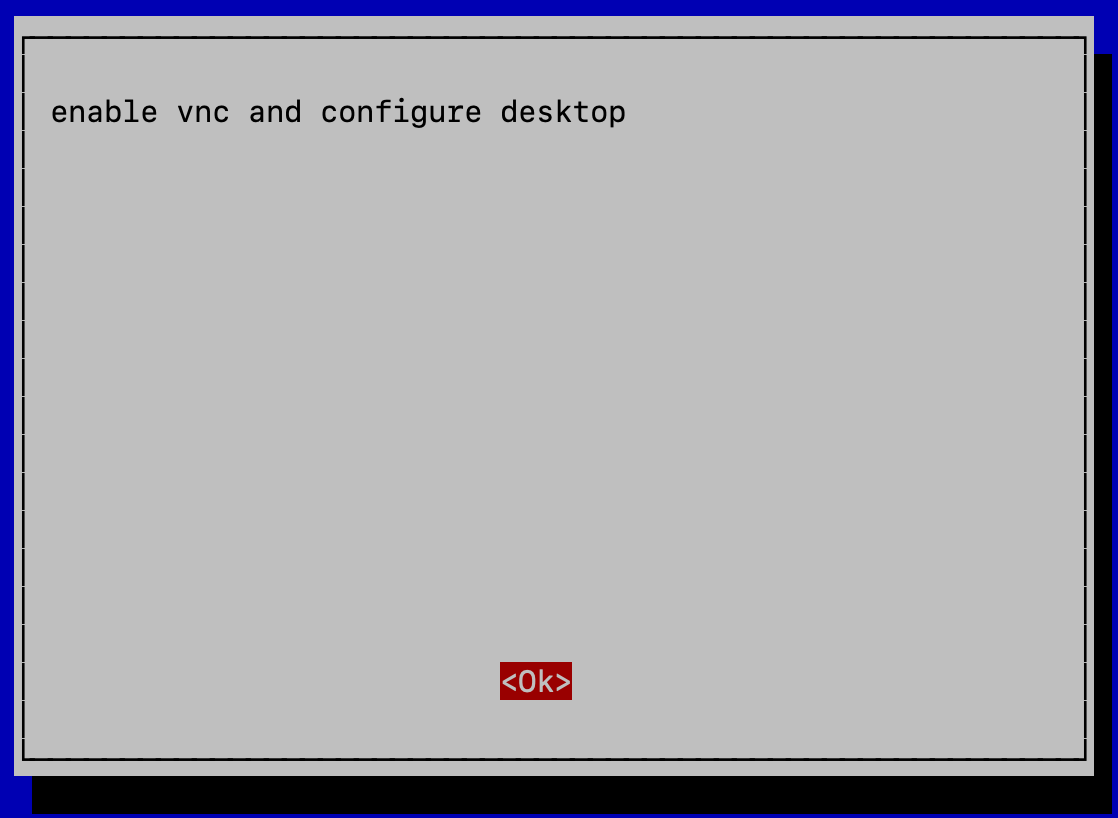
OKto enable vnc and configure desktop
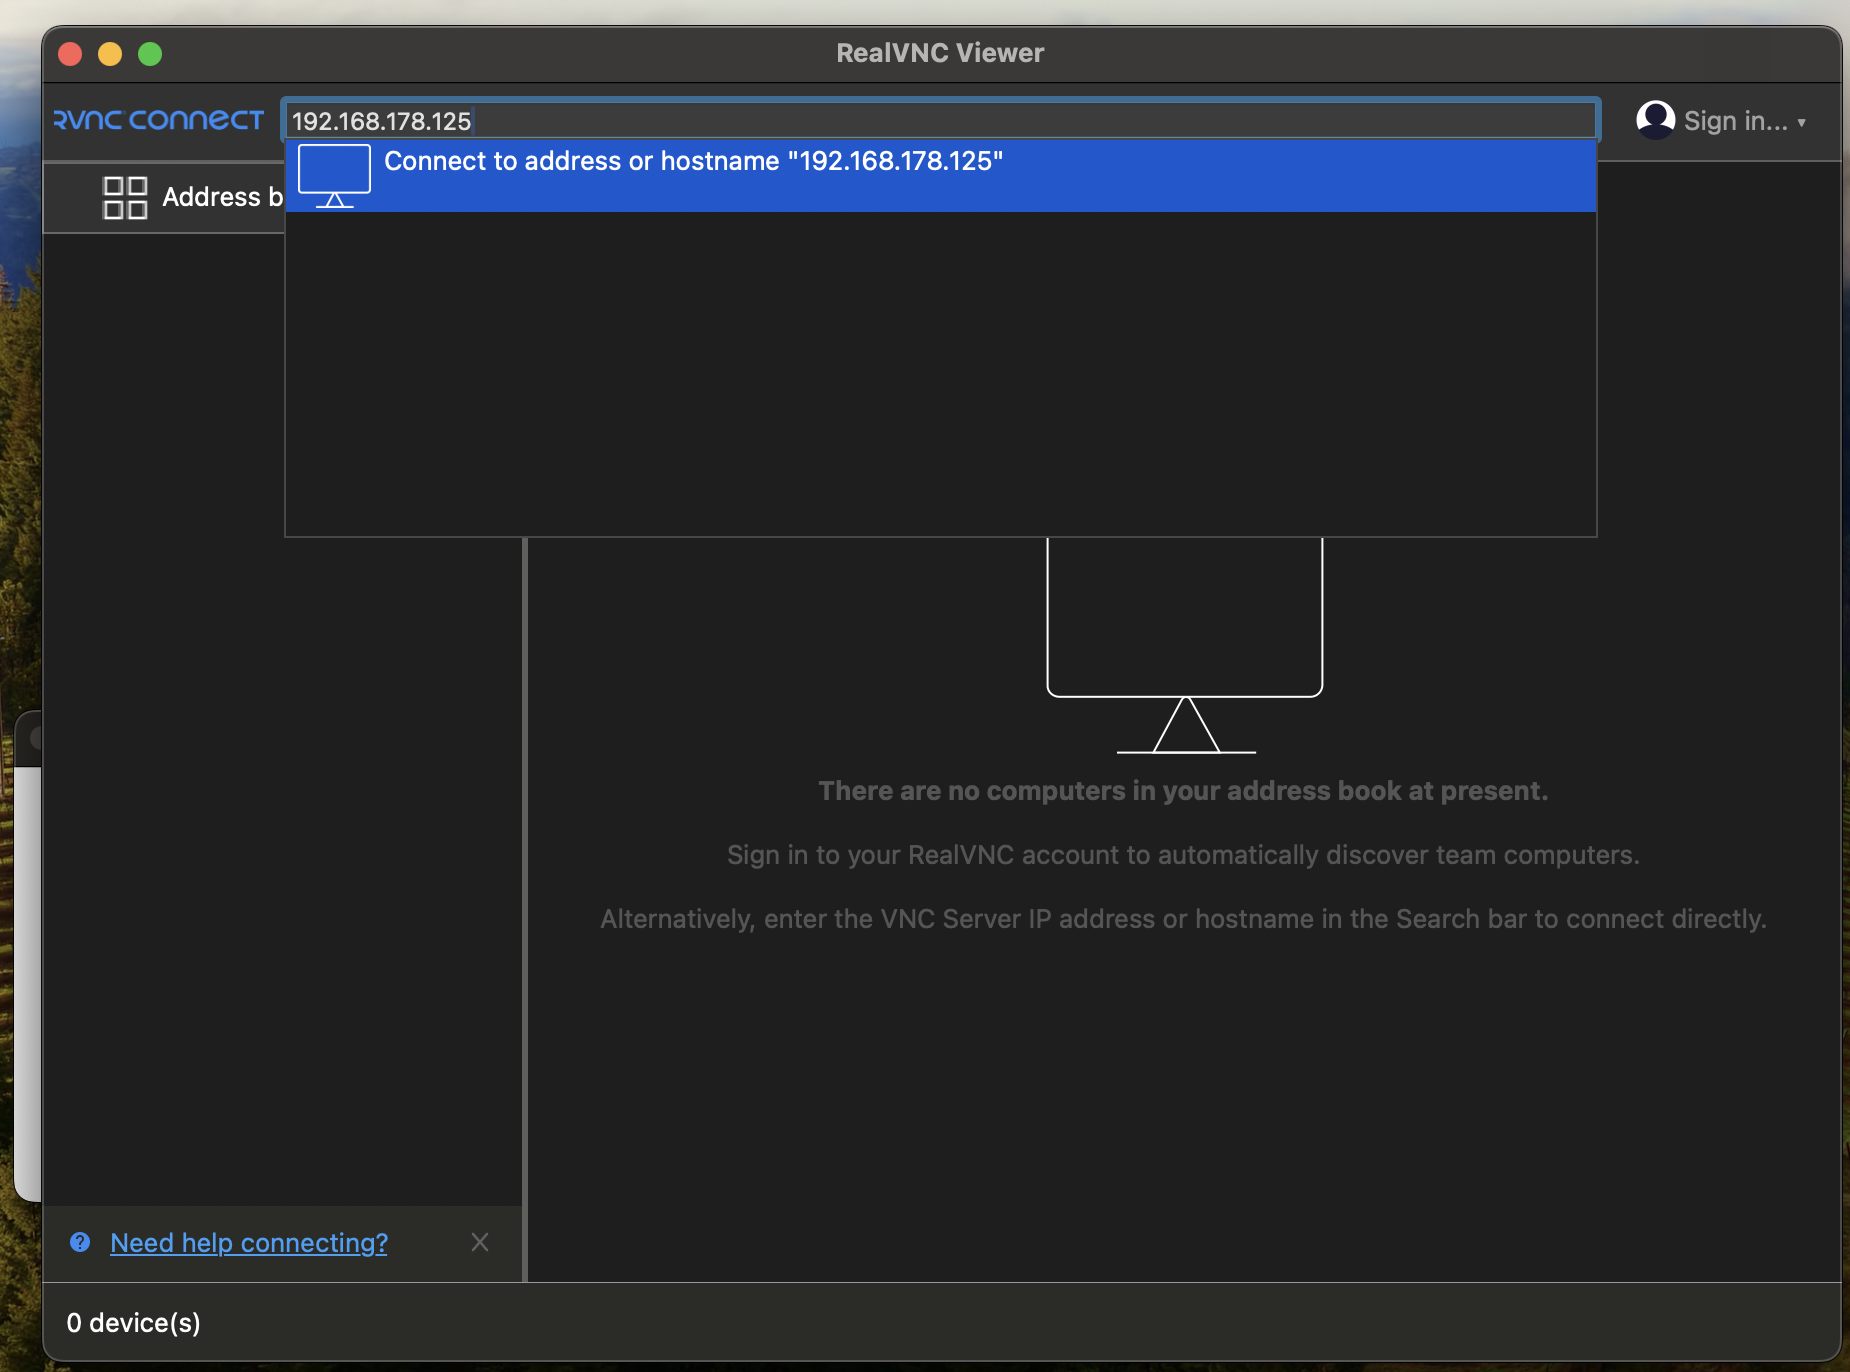
You can then use the remote computer to connect to the Raspberry Pi via VNC protocol. Open the VNC client and enter the IP address of the Raspberry Pi. You will need to enter the username and password for the Pi and you are all set.
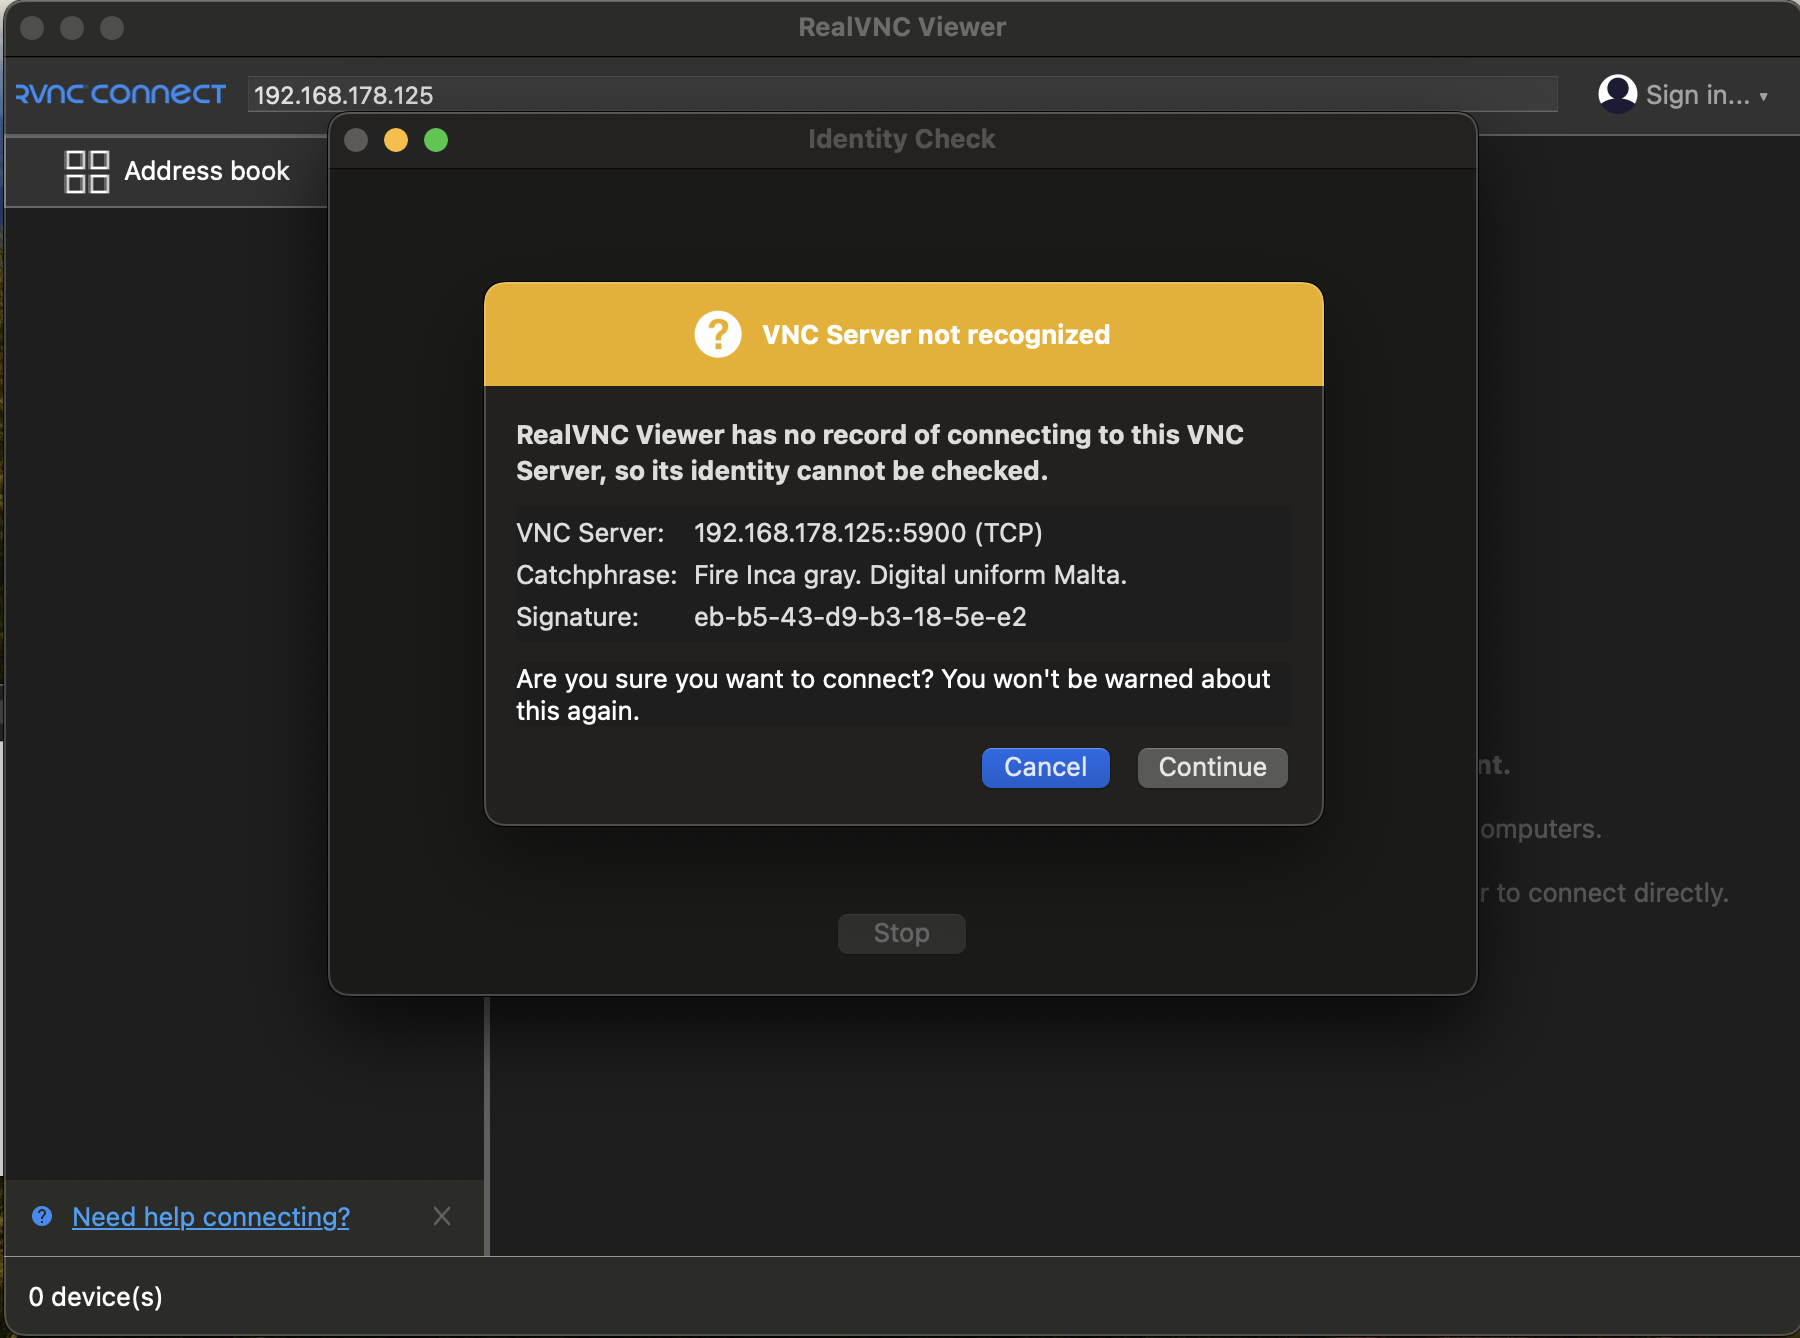
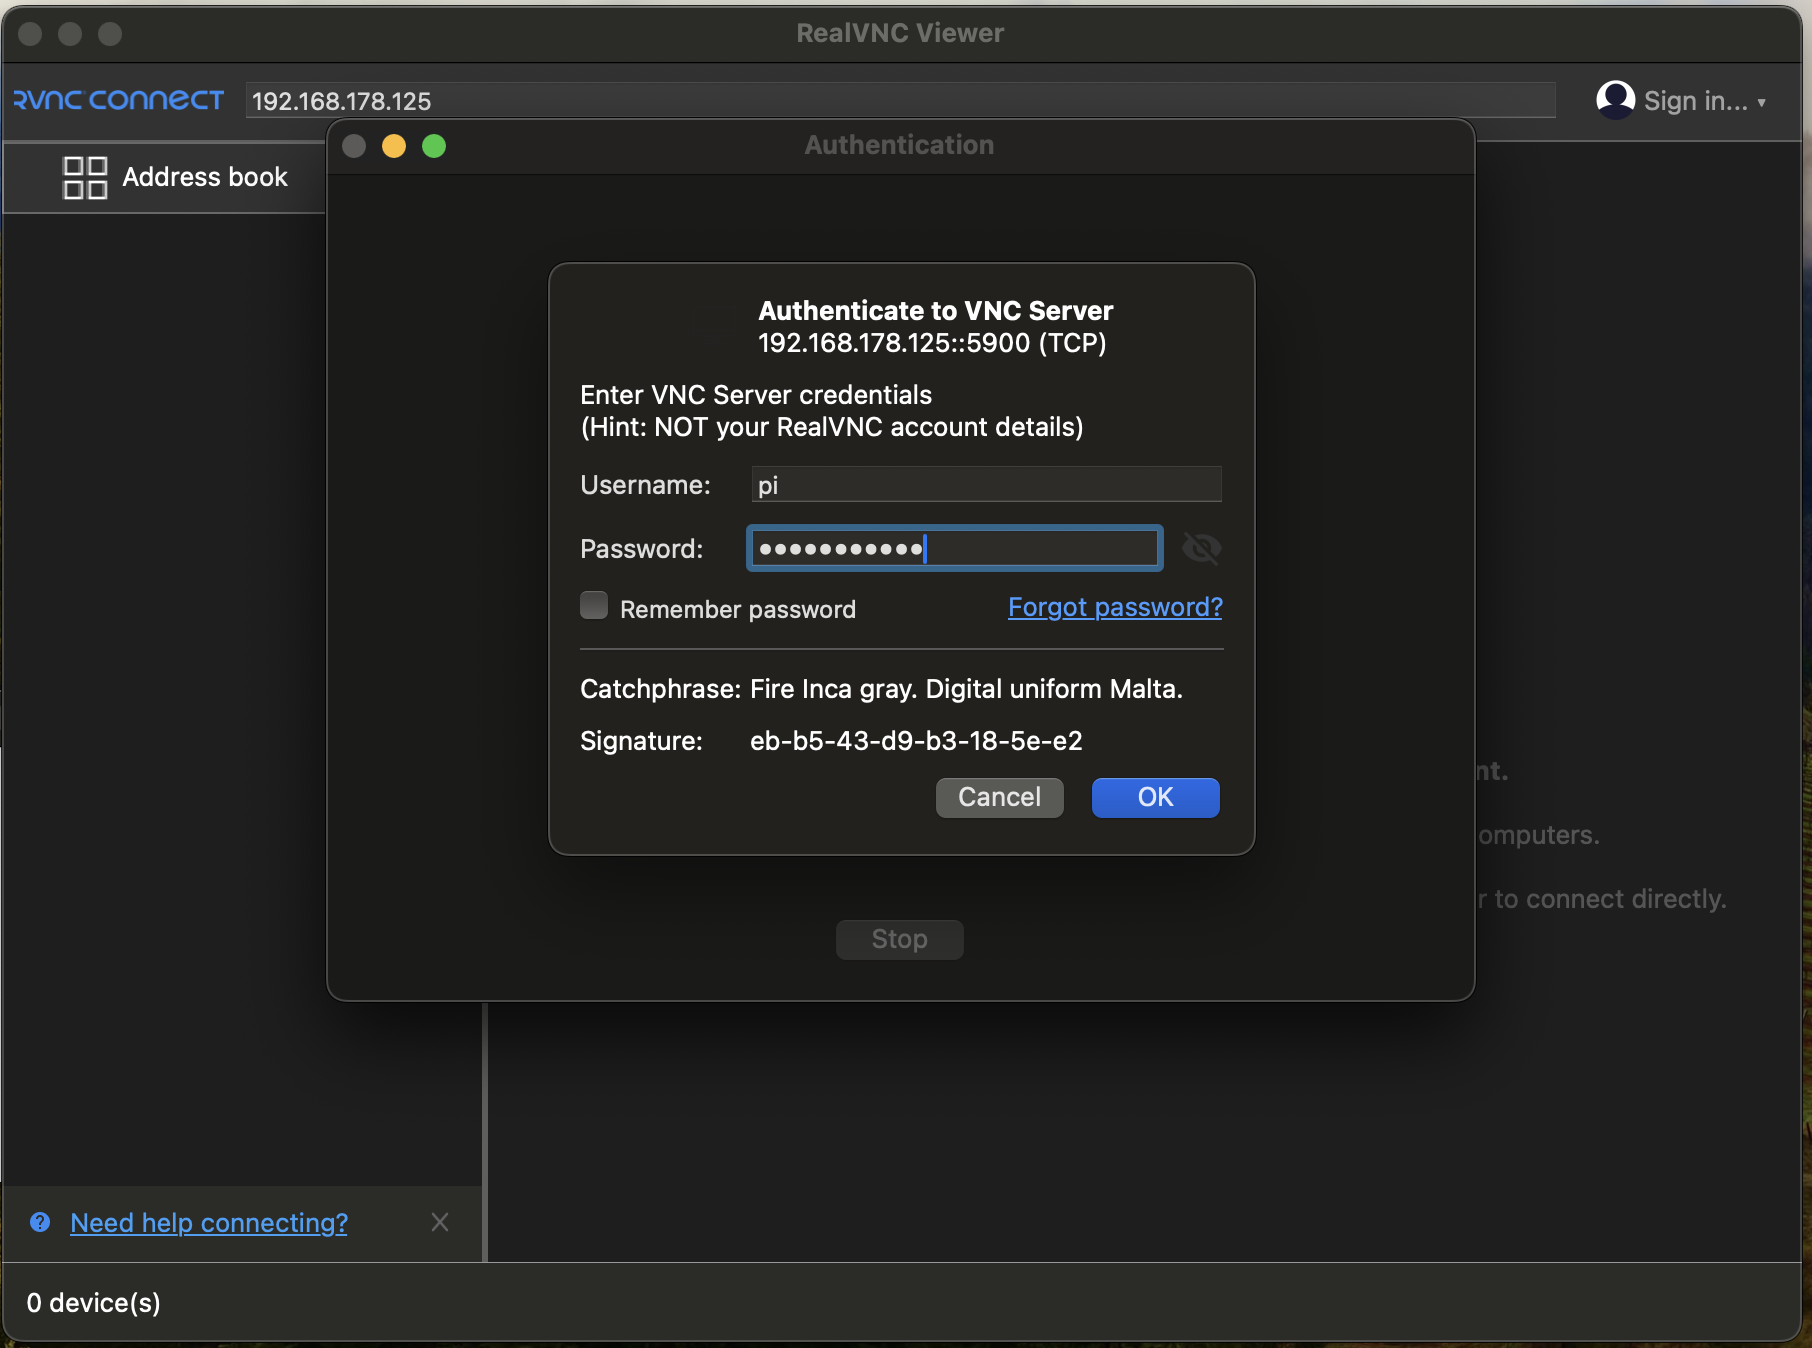
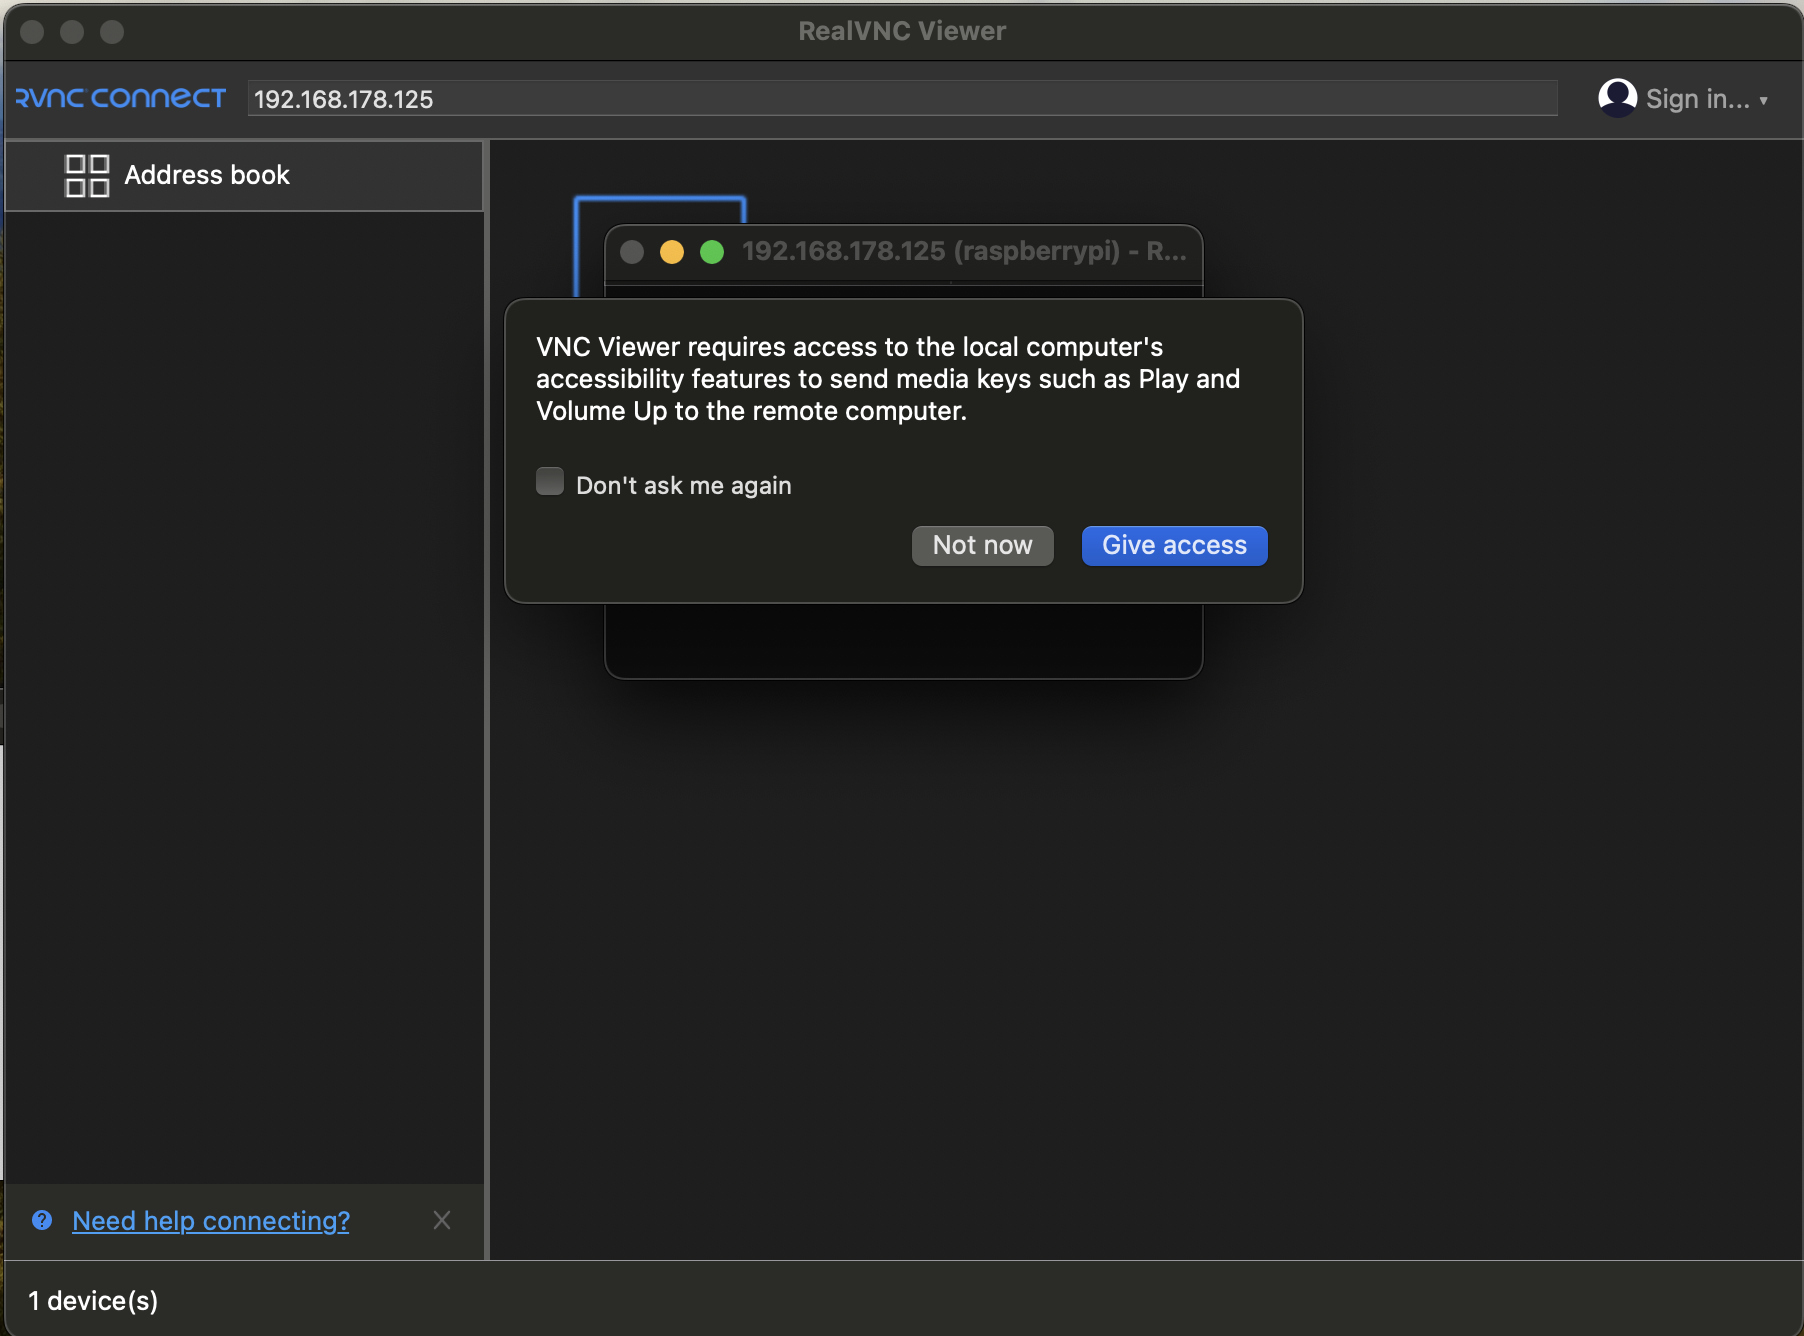
Note: During the test, I did experience an error while connecting from a mac device as seen in the picture below.
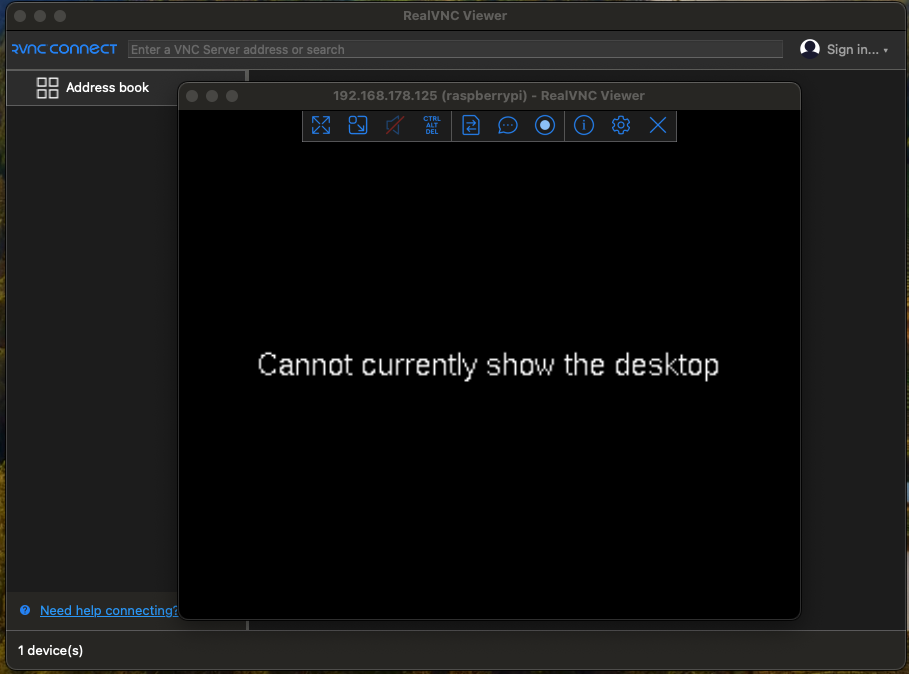
To fix this issue, modify the /boot/config.txt file and uncomment the 3 lines as shown in the post here or the video here.
Below is what the file looked like before modifying.
pi@raspberrypi:~ $ cat /boot/config.txt | grep -i hdmi
# uncomment if you get no picture on HDMI for a default "safe" mode
#hdmi_safe=1
# uncomment if hdmi display is not detected and composite is being output
#hdmi_force_hotplug=1
# uncomment to force a specific HDMI mode (this will force VGA)
#hdmi_group=1
#hdmi_mode=1
# uncomment to force a HDMI mode rather than DVI. This can make audio work in
#hdmi_drive=2
# uncomment to increase signal to HDMI, if you have interference, blanking, or
#config_hdmi_boost=4
These are the changes that were made.
# uncomment if hdmi display is not detected and composite is being output
hdmi_force_hotplug=1

# uncomment to force a specific HDMI mode (this will force VGA)
hdmi_group=1
hdmi_mode=1
This is what the file looked like after modifying.
pi@raspberrypi:~ $ cat /boot/config.txt | grep -i hdmi
# uncomment if you get no picture on HDMI for a default "safe" mode
#hdmi_safe=1
# uncomment if hdmi display is not detected and composite is being output
hdmi_force_hotplug=1
# uncomment to force a specific HDMI mode (this will force VGA)
hdmi_group=1
hdmi_mode=1
# uncomment to force a HDMI mode rather than DVI. This can make audio work in
#hdmi_drive=2
# uncomment to increase signal to HDMI, if you have interference, blanking, or
#config_hdmi_boost=4
You then need to reboot the Raspberry Pi before attempting a connection.
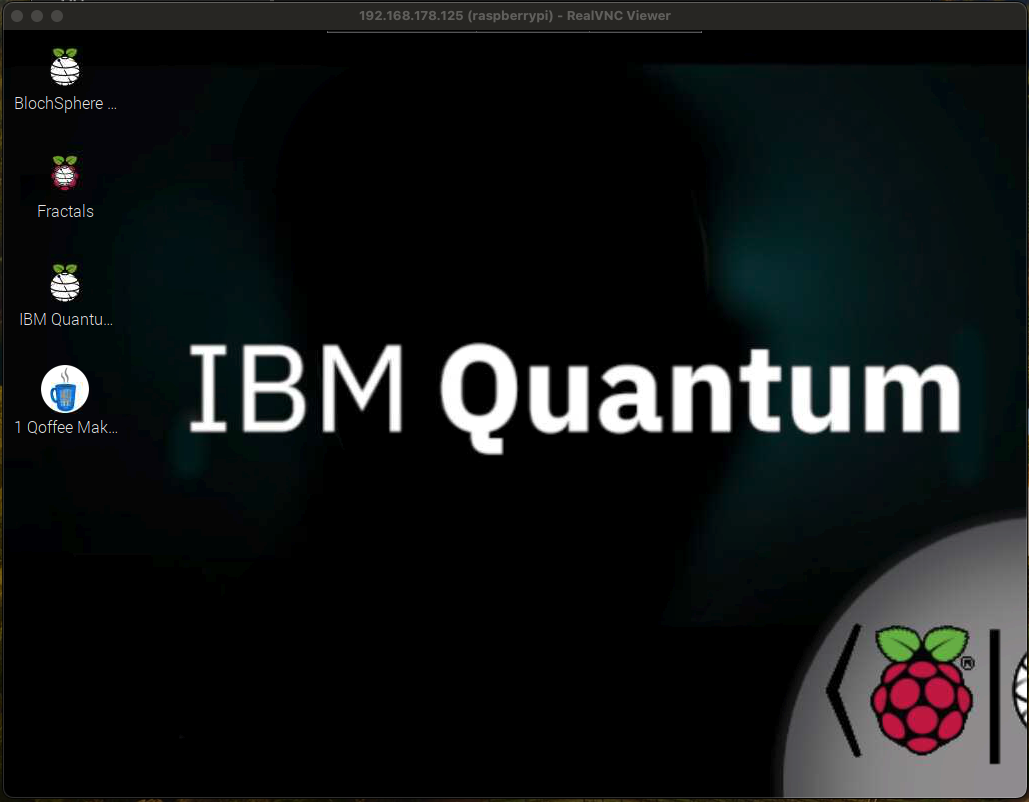
sudo reboot
And there we have it, connection success!
GOD DOES PLAY DICE. COME PLAY, BUILD, LEARN.
Part of the Fun with Quantum family: Fun with Quantum · RasQberry Two · Quantego · Qutie · Qoffee-Maker
Open source, built by Jan-R. Lahmann and the RasQberry community.